Let's Build a Garden!
Automating irrigation with a Raspberry Pi
Last Updated: September 15, 2020
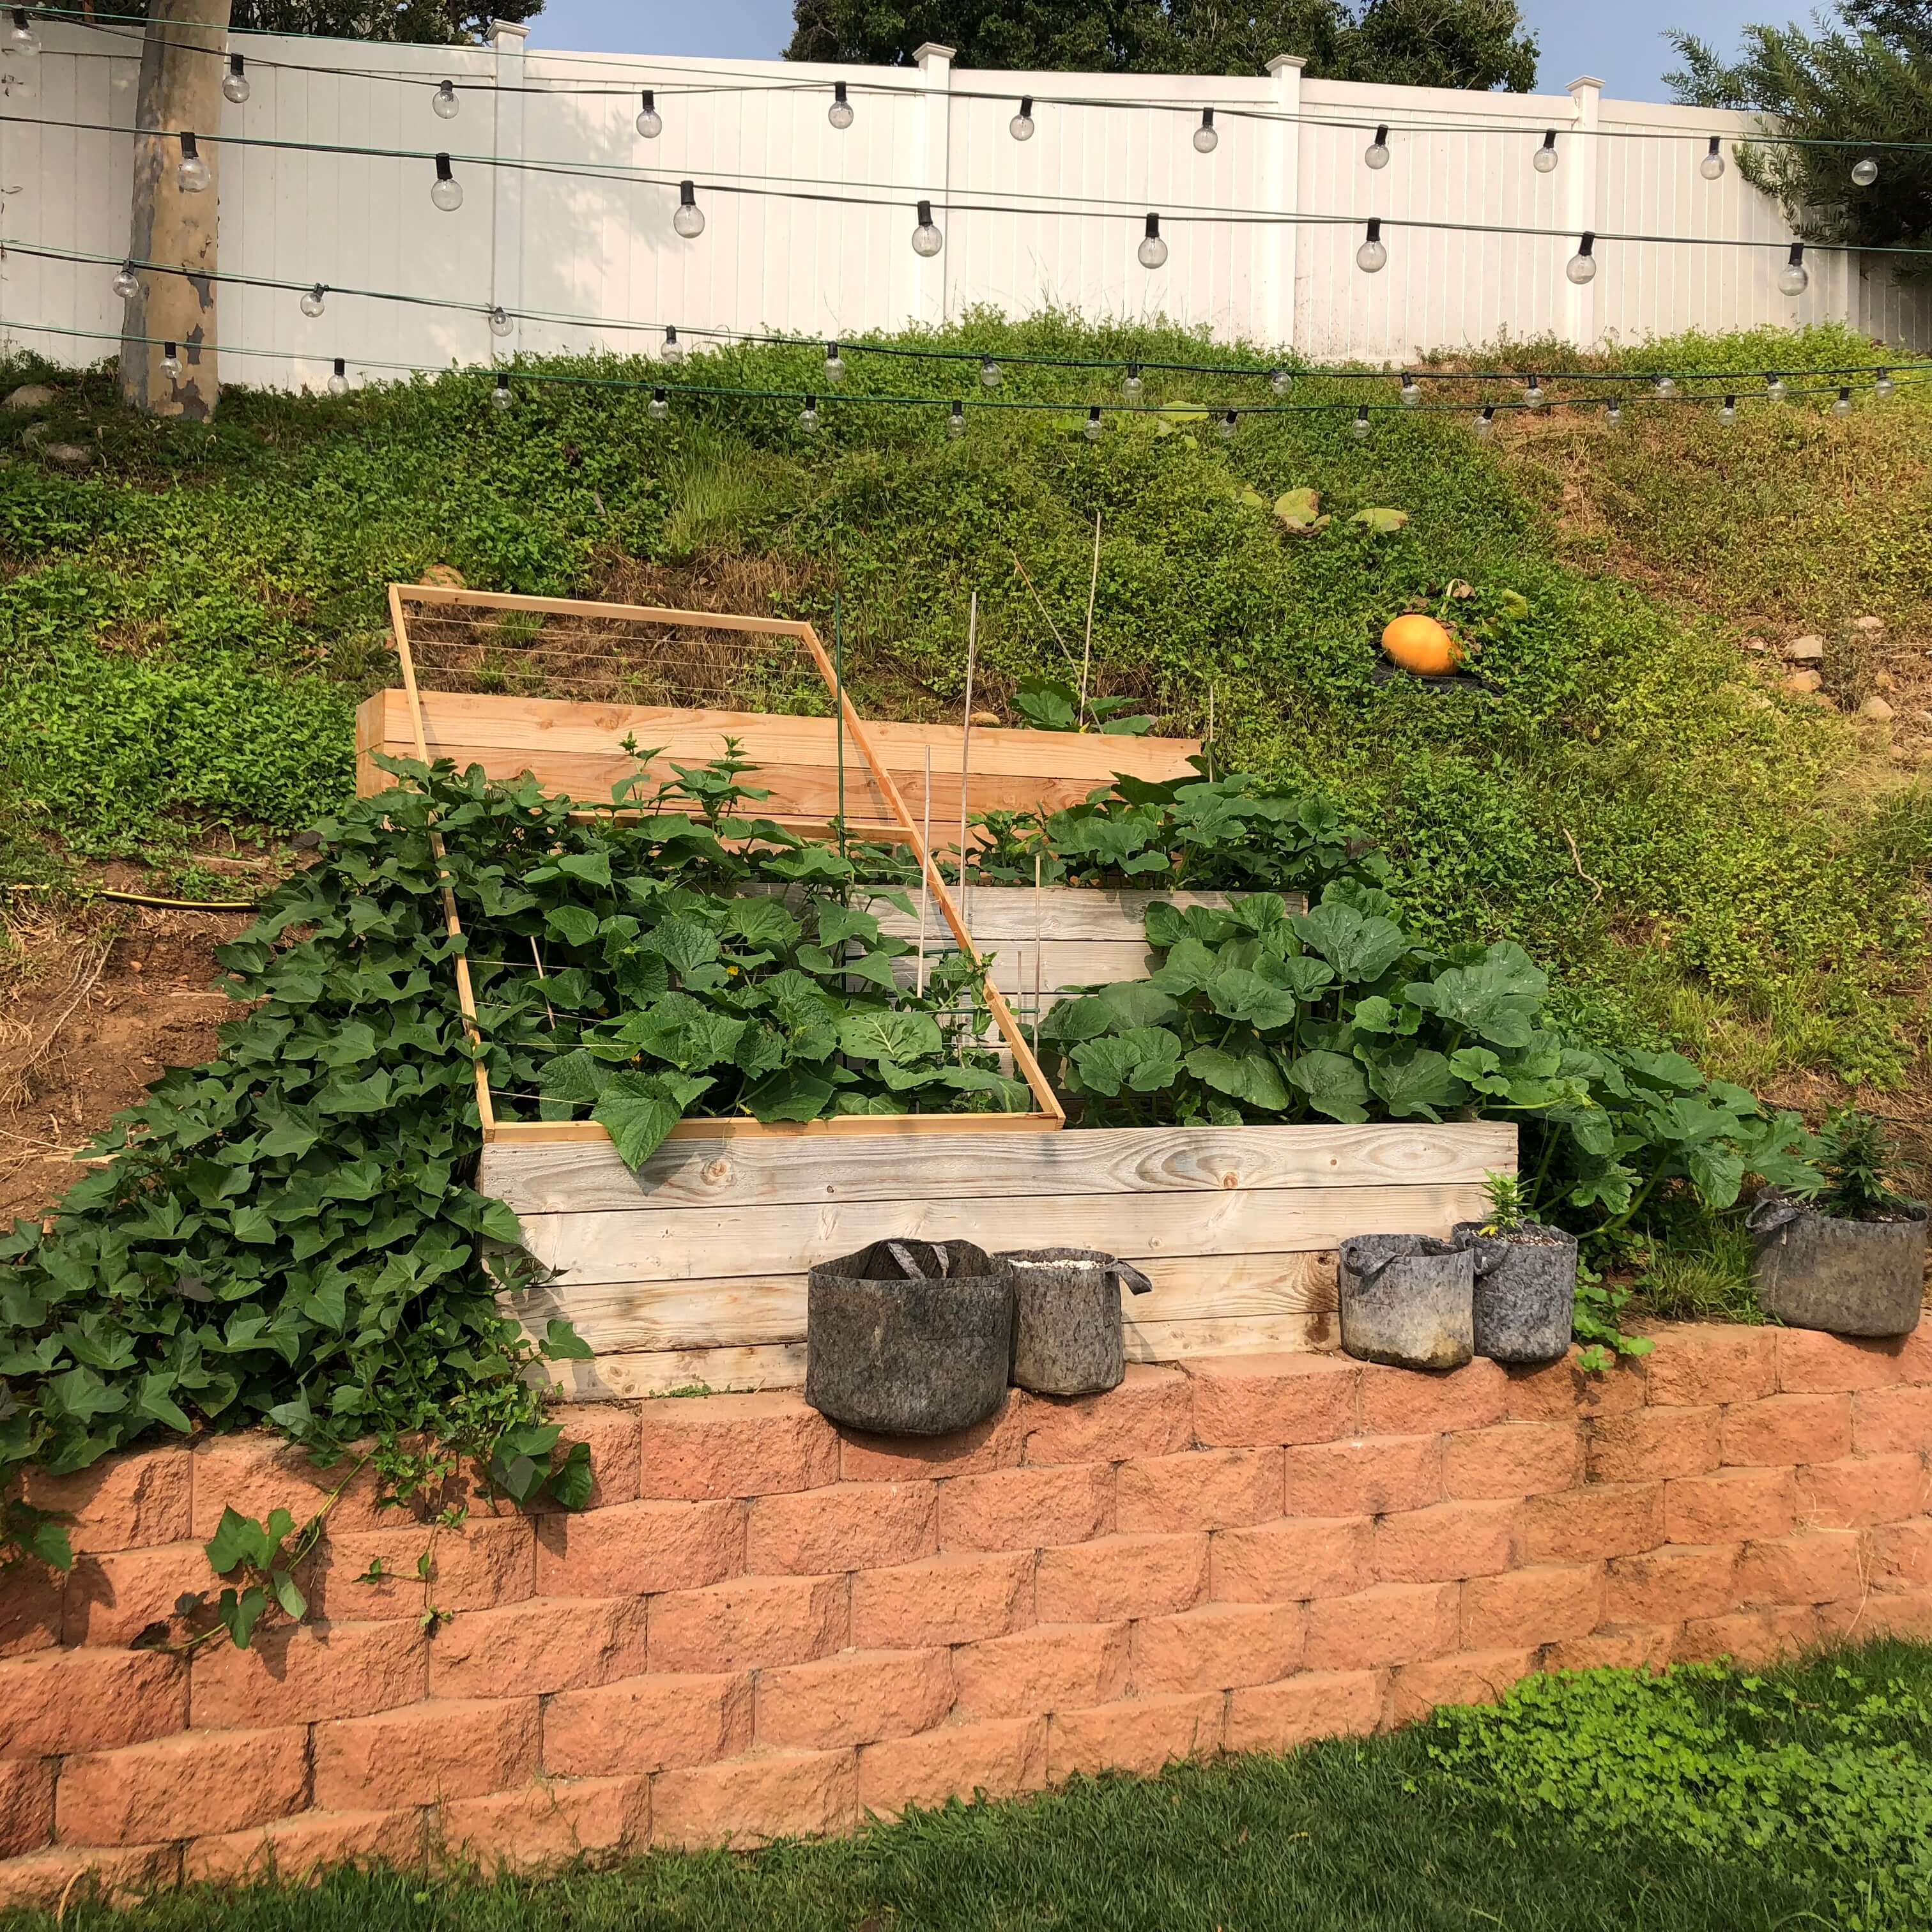
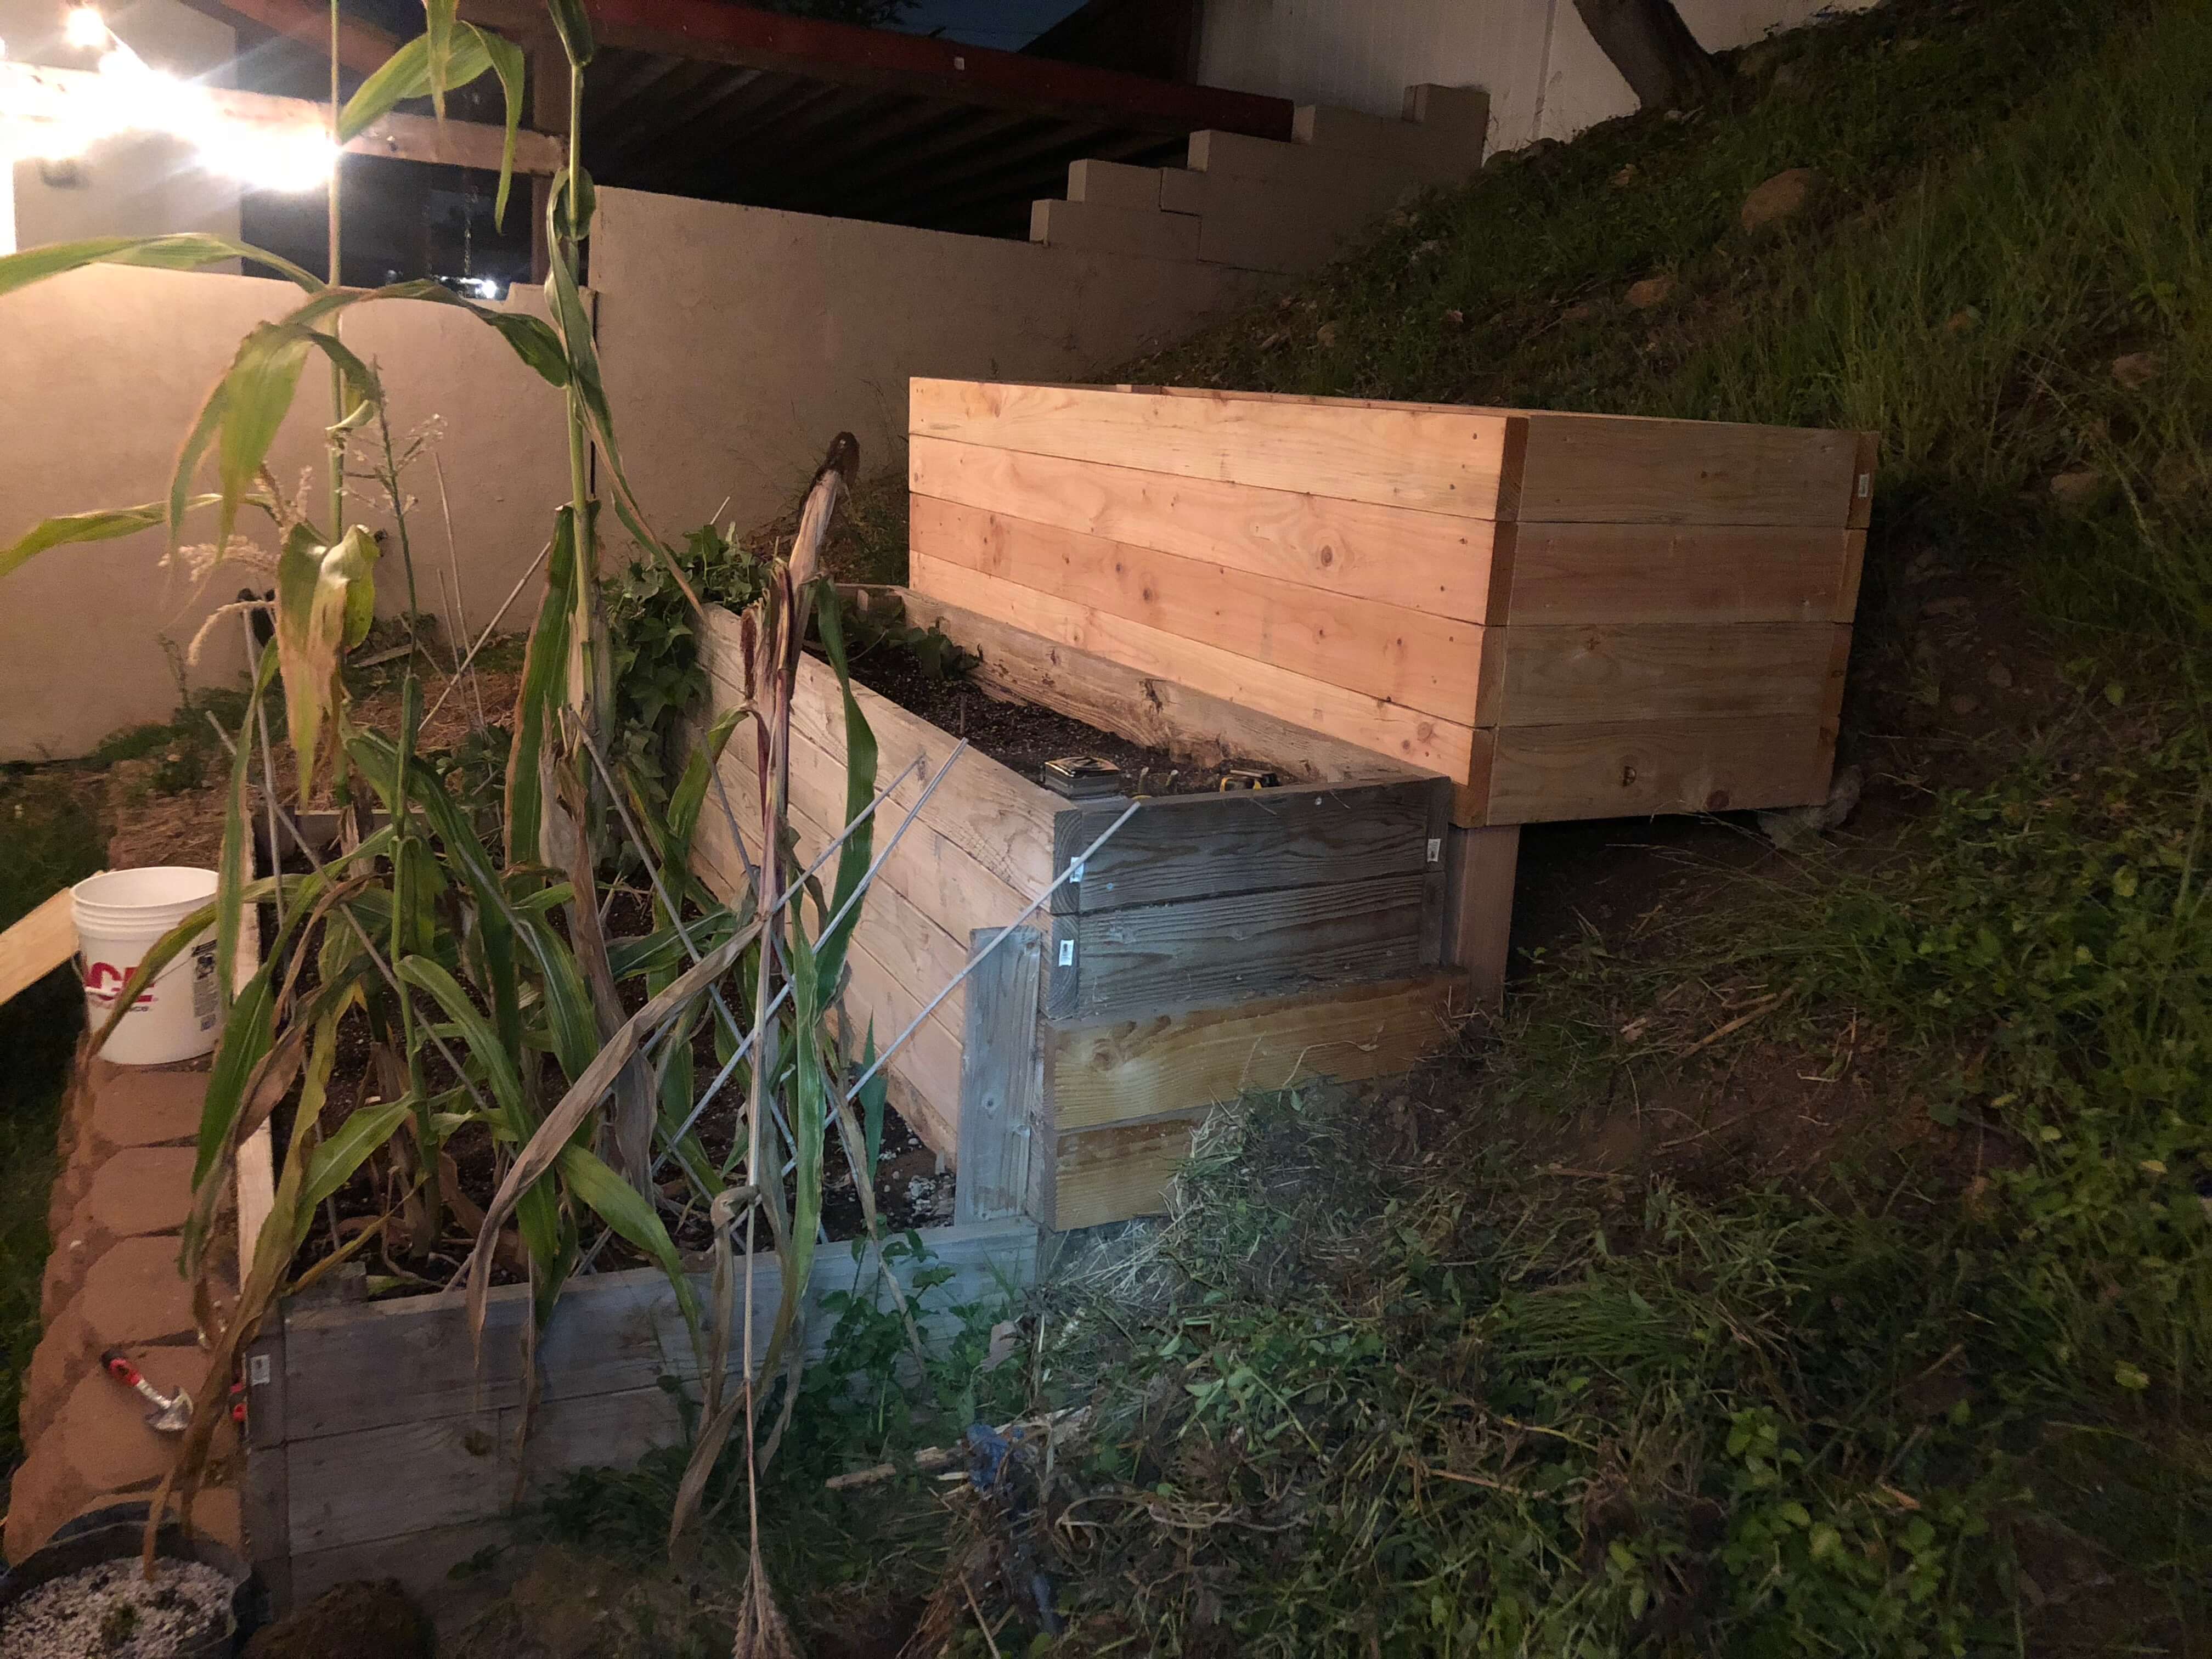
The finished product
In the summer of 2020 I found myself stuck at home and in need of a project. So I decided to try my hand at gardening. There's ample space in the backyard, and the weather was nice. I had been looking for an electronics project too, so I incorporated a Raspberry Pi to create a custom automated irrigation system.
Ultimately, the project can be broken down into 3 phases:
- Building the raised bed
- Assembling the irrigation system
- Programming the Pi
At the end of the day, the Pi programming turned out to be a small portion of the total work (I learned a lot more about irrigation systems). Overall, though, it turned out to be a really fun and rewarding project, and as of late September the plants are looking great!
Part i: Building the raised bed
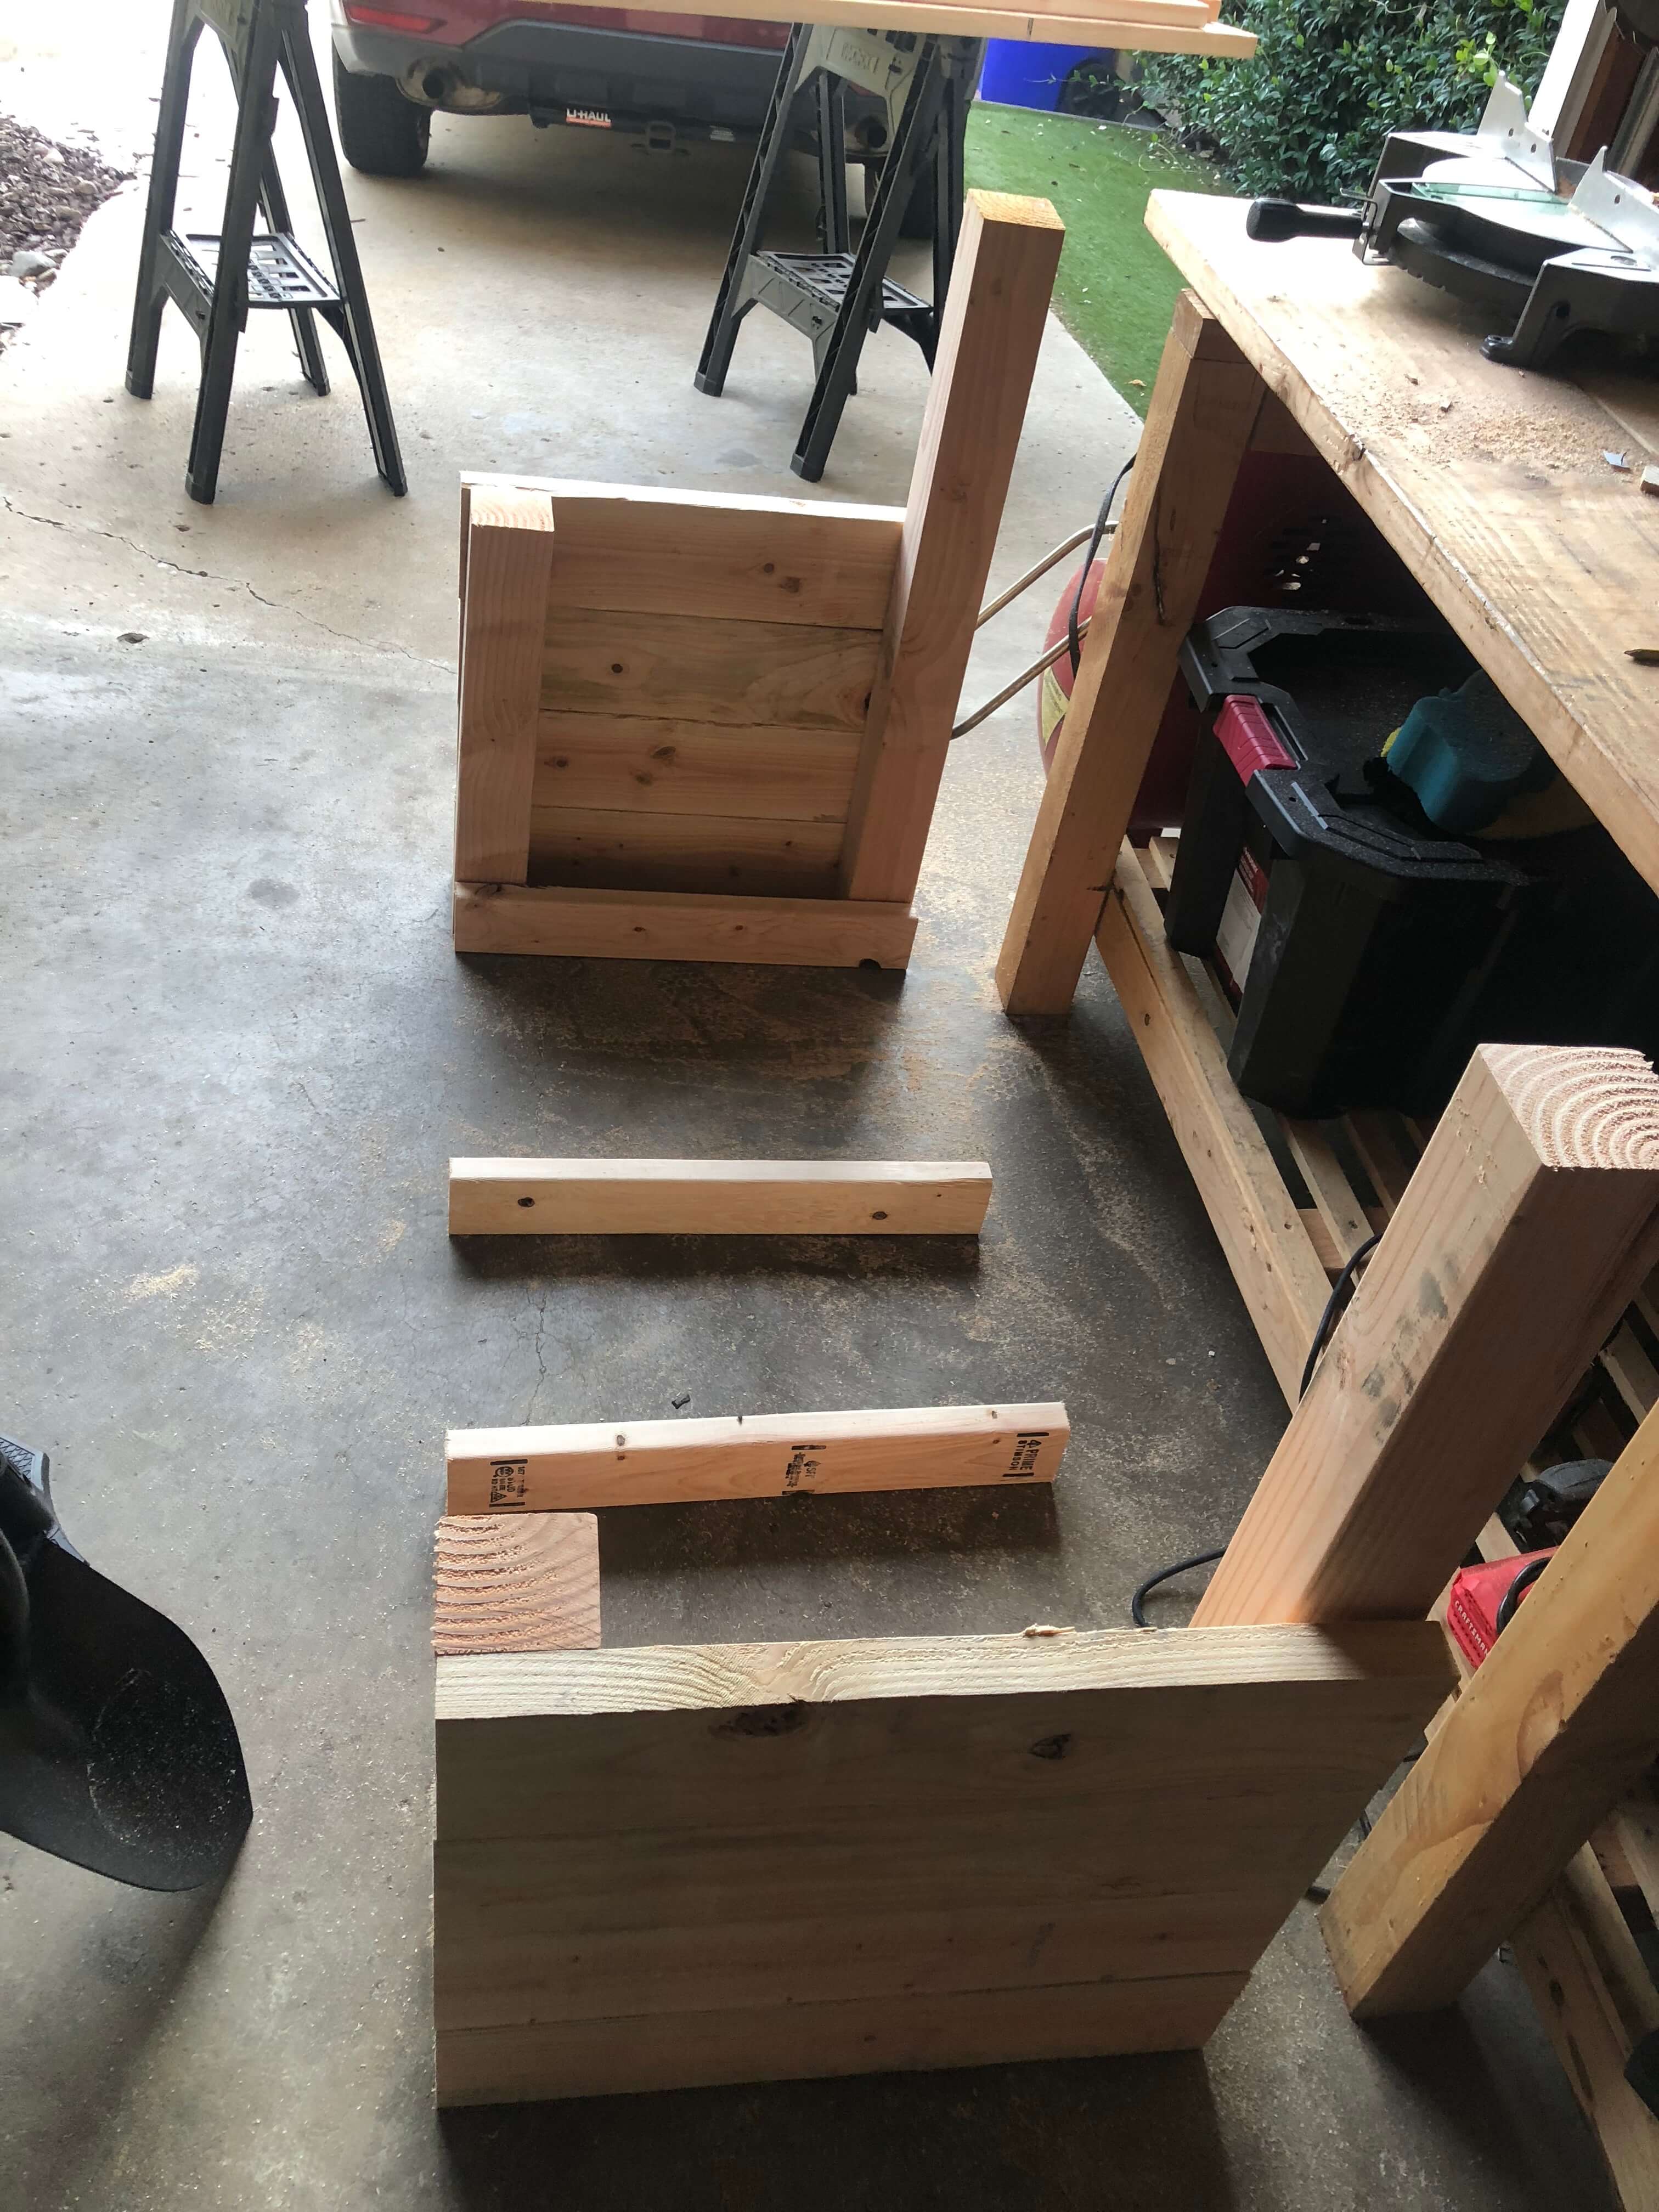
Laying out the bed in the garage (upside down)
The raised bed primarily consists of 2x6s on the exterior, four 4x4s on the corners to serve as posts, several 2x4s along the bottom for support, and a sheet of 3/4" plywood with 1" holes drilled periodically for drainage. Because I'm building the bed on a hill of clay (which isn't easy to terraform), there is a lot of space between the bottom of the bed and the ground. I got a roll of thin galvanized wire fencing to run around the outside to keep critters out. I also put a layer of weed-blocking fabric on the bottom plywood to keep anything from growing up into the beds, as well as preventing dirt from slowly falling out the bottom.
I made the 4x4s different lengths in the front and the back so that I could minimize how much terraforming I'd have to do on the clay hillside. I took a rough measurement of the hill angle and cut the 4x4s appropriately. Now, I only have to dig small holes to place the front legs, and the back of the box sits level on the hillside.
Night 1:
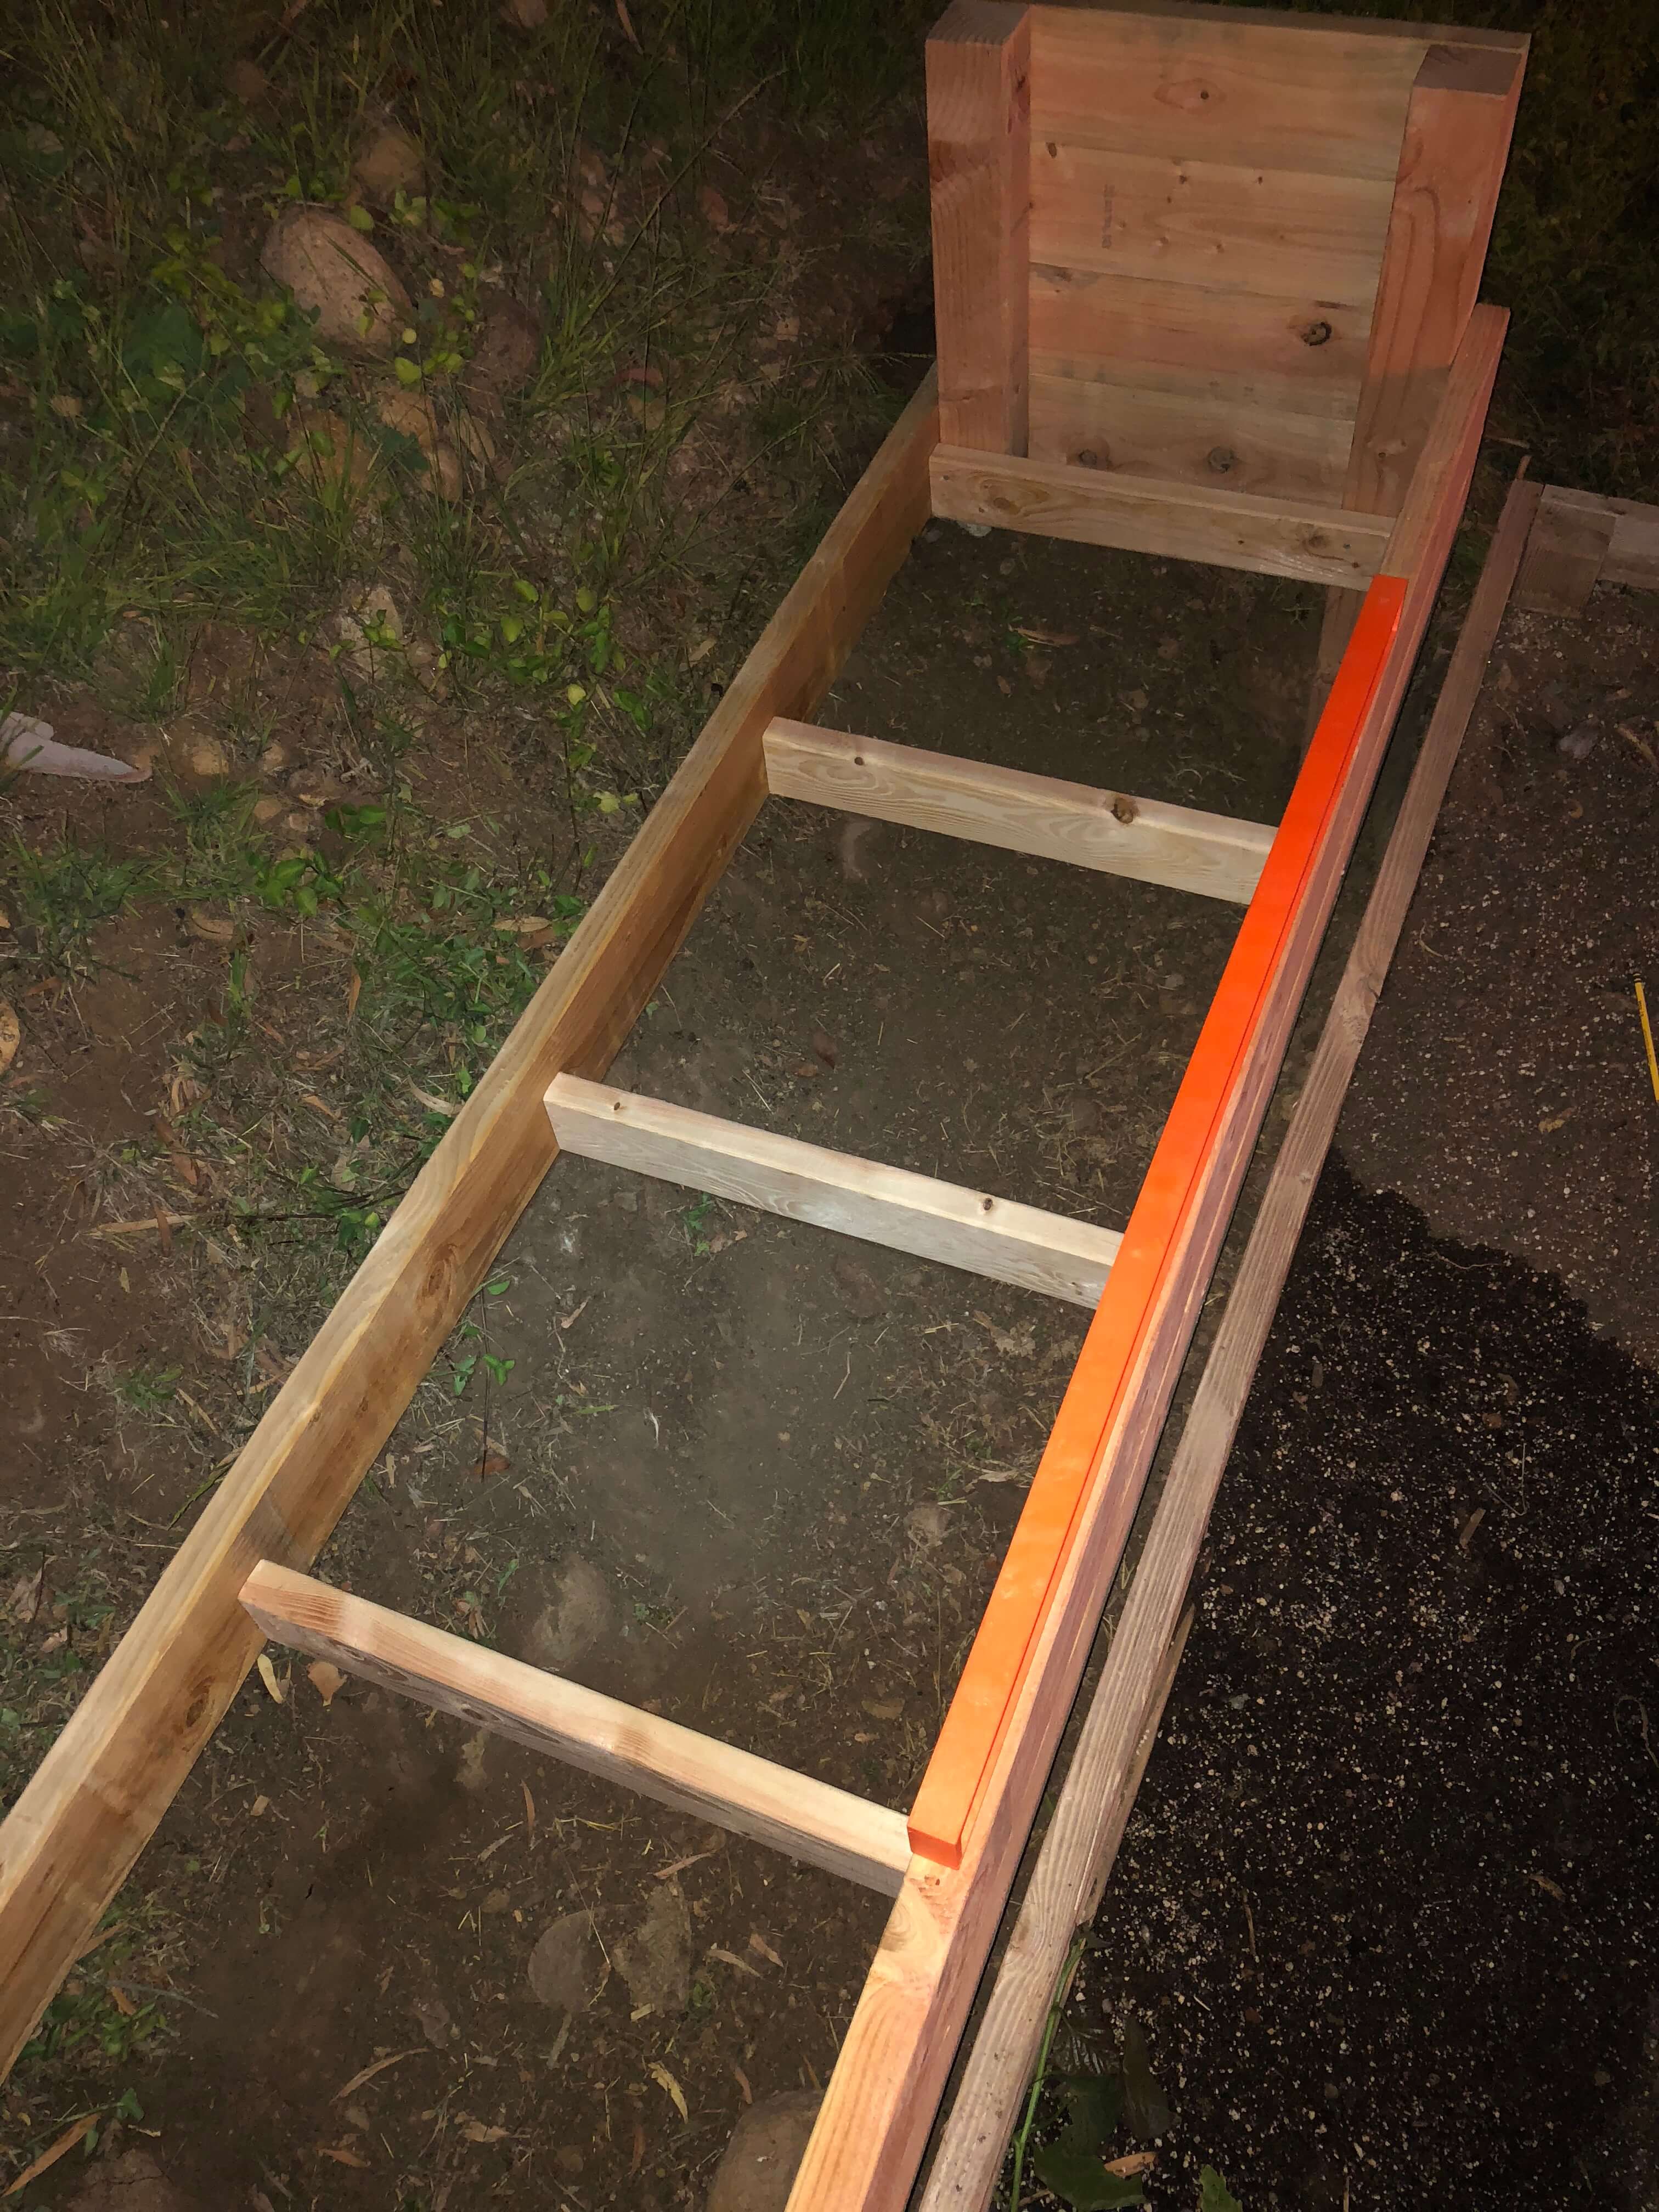
I made the cuts during the day but left the assembly until the evening because I didn't want to be outside in the middle of a heat wave.
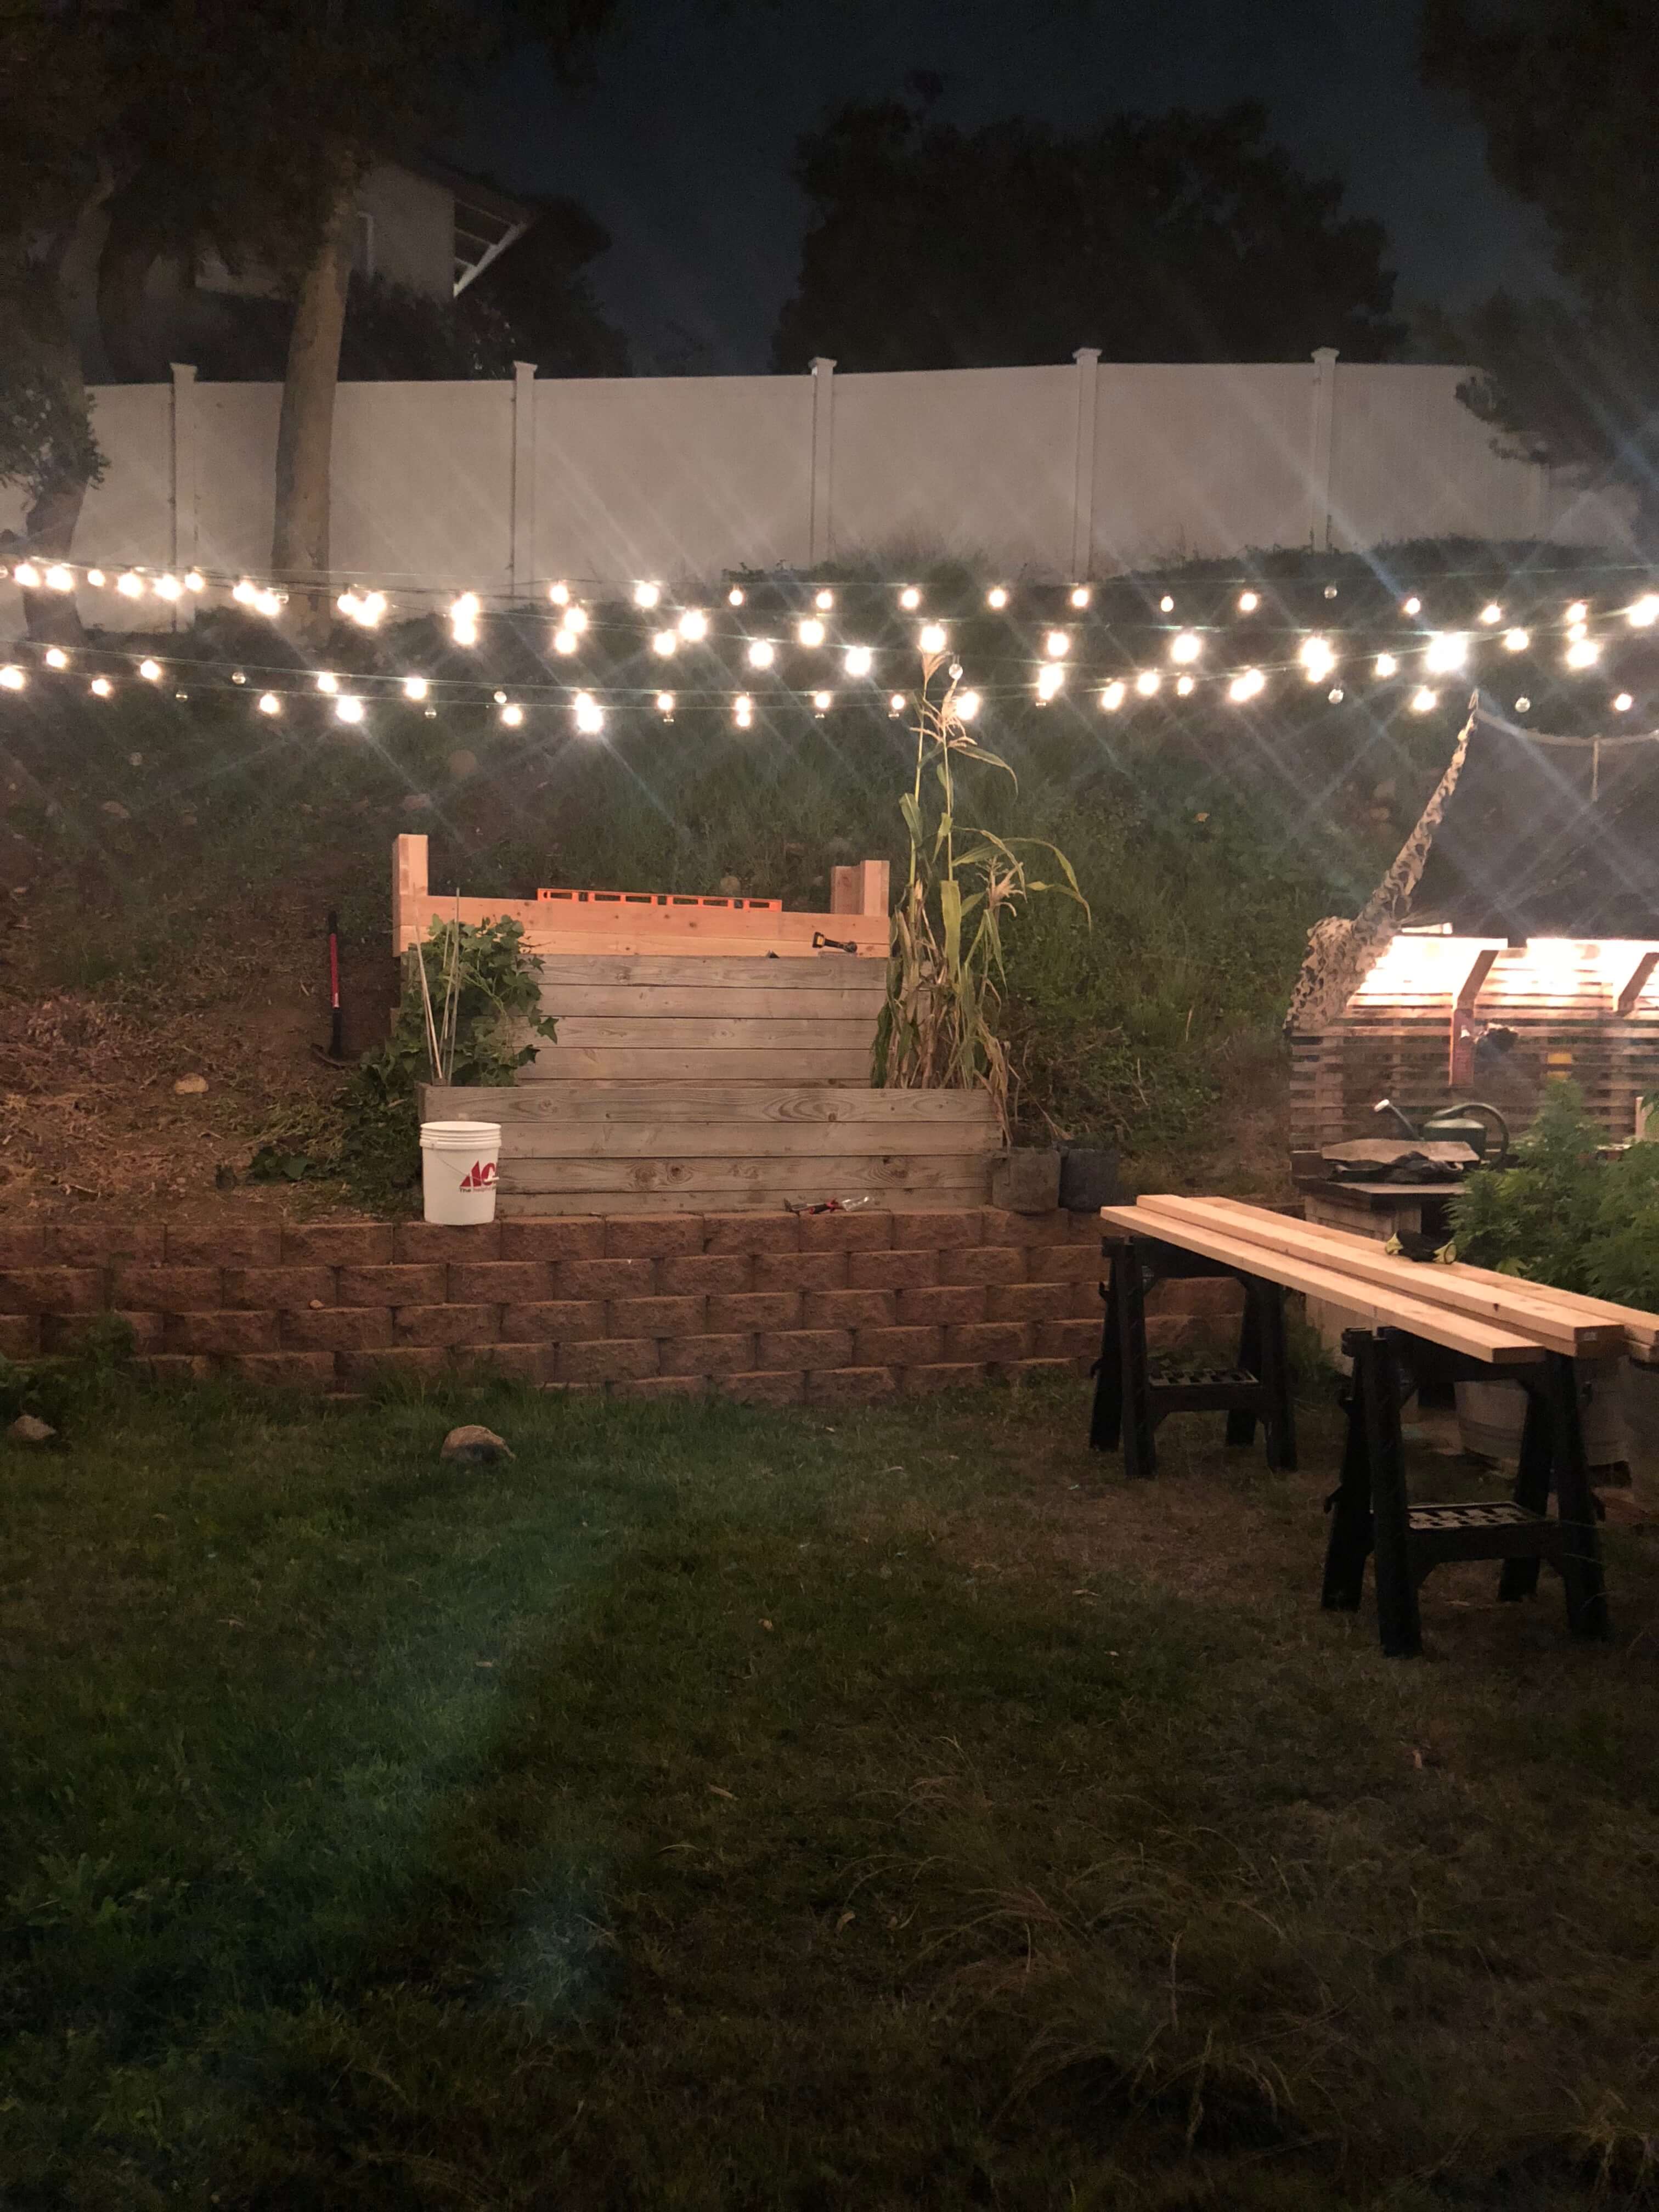
The following day:
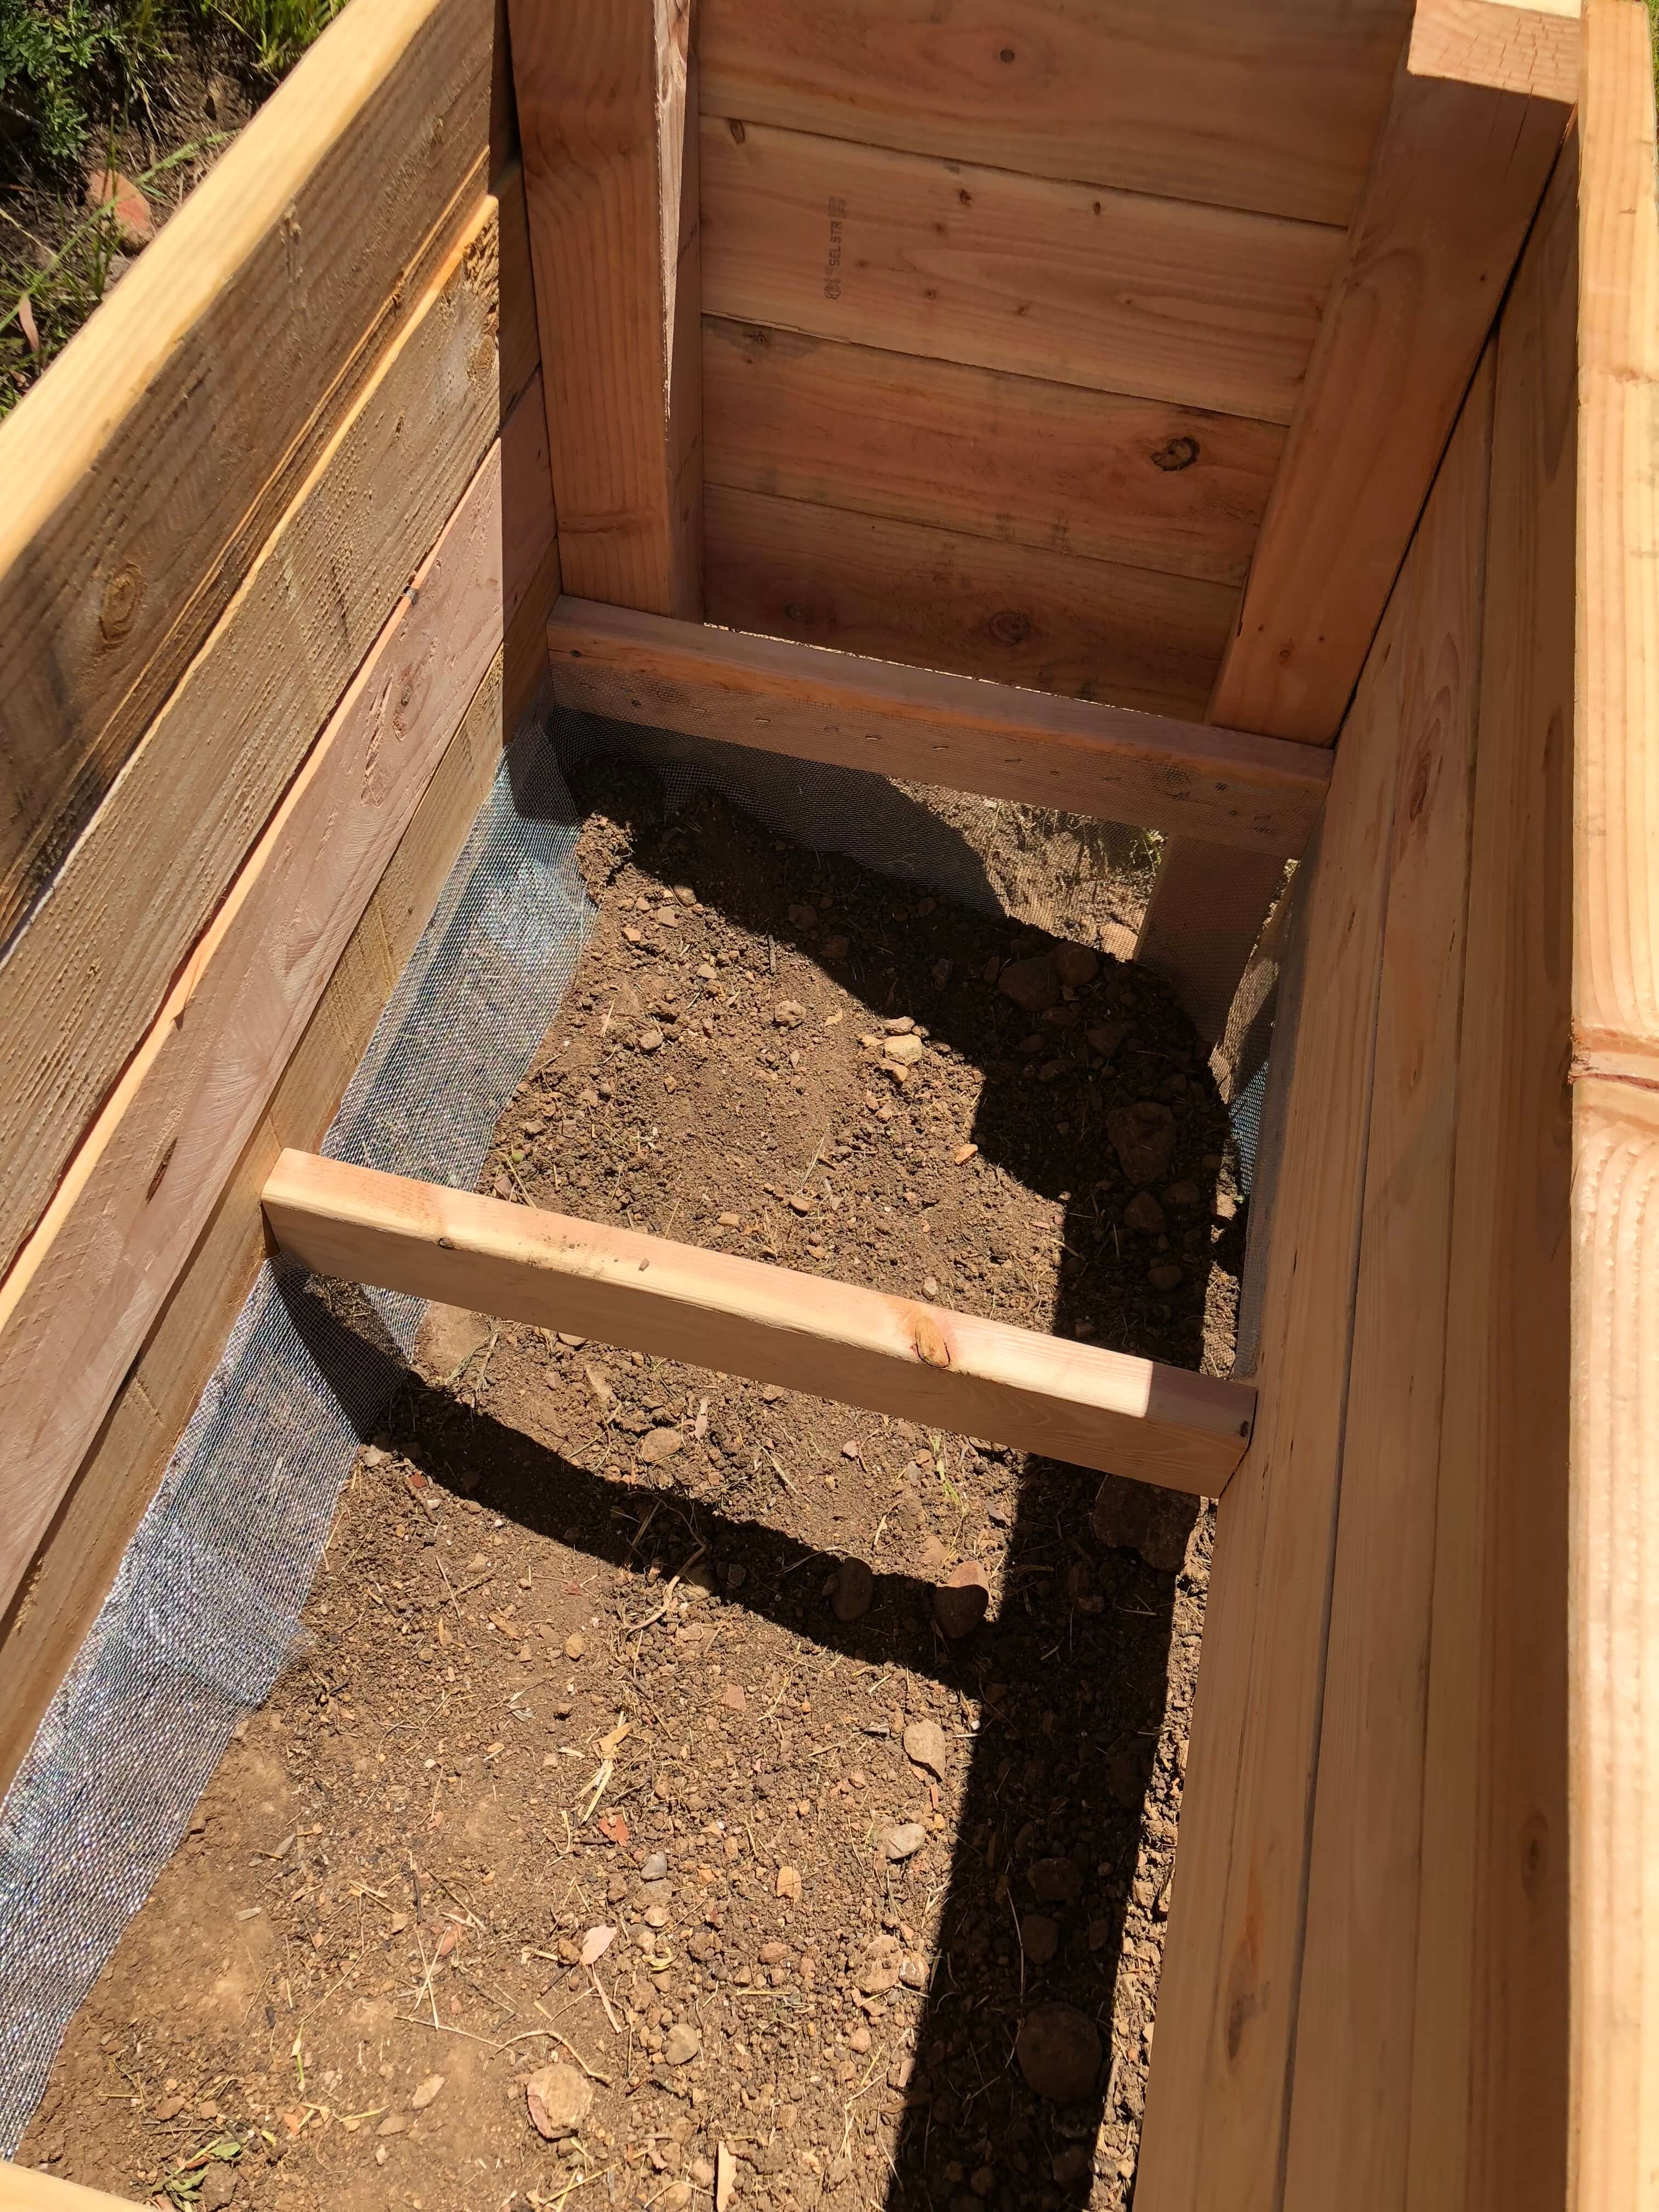
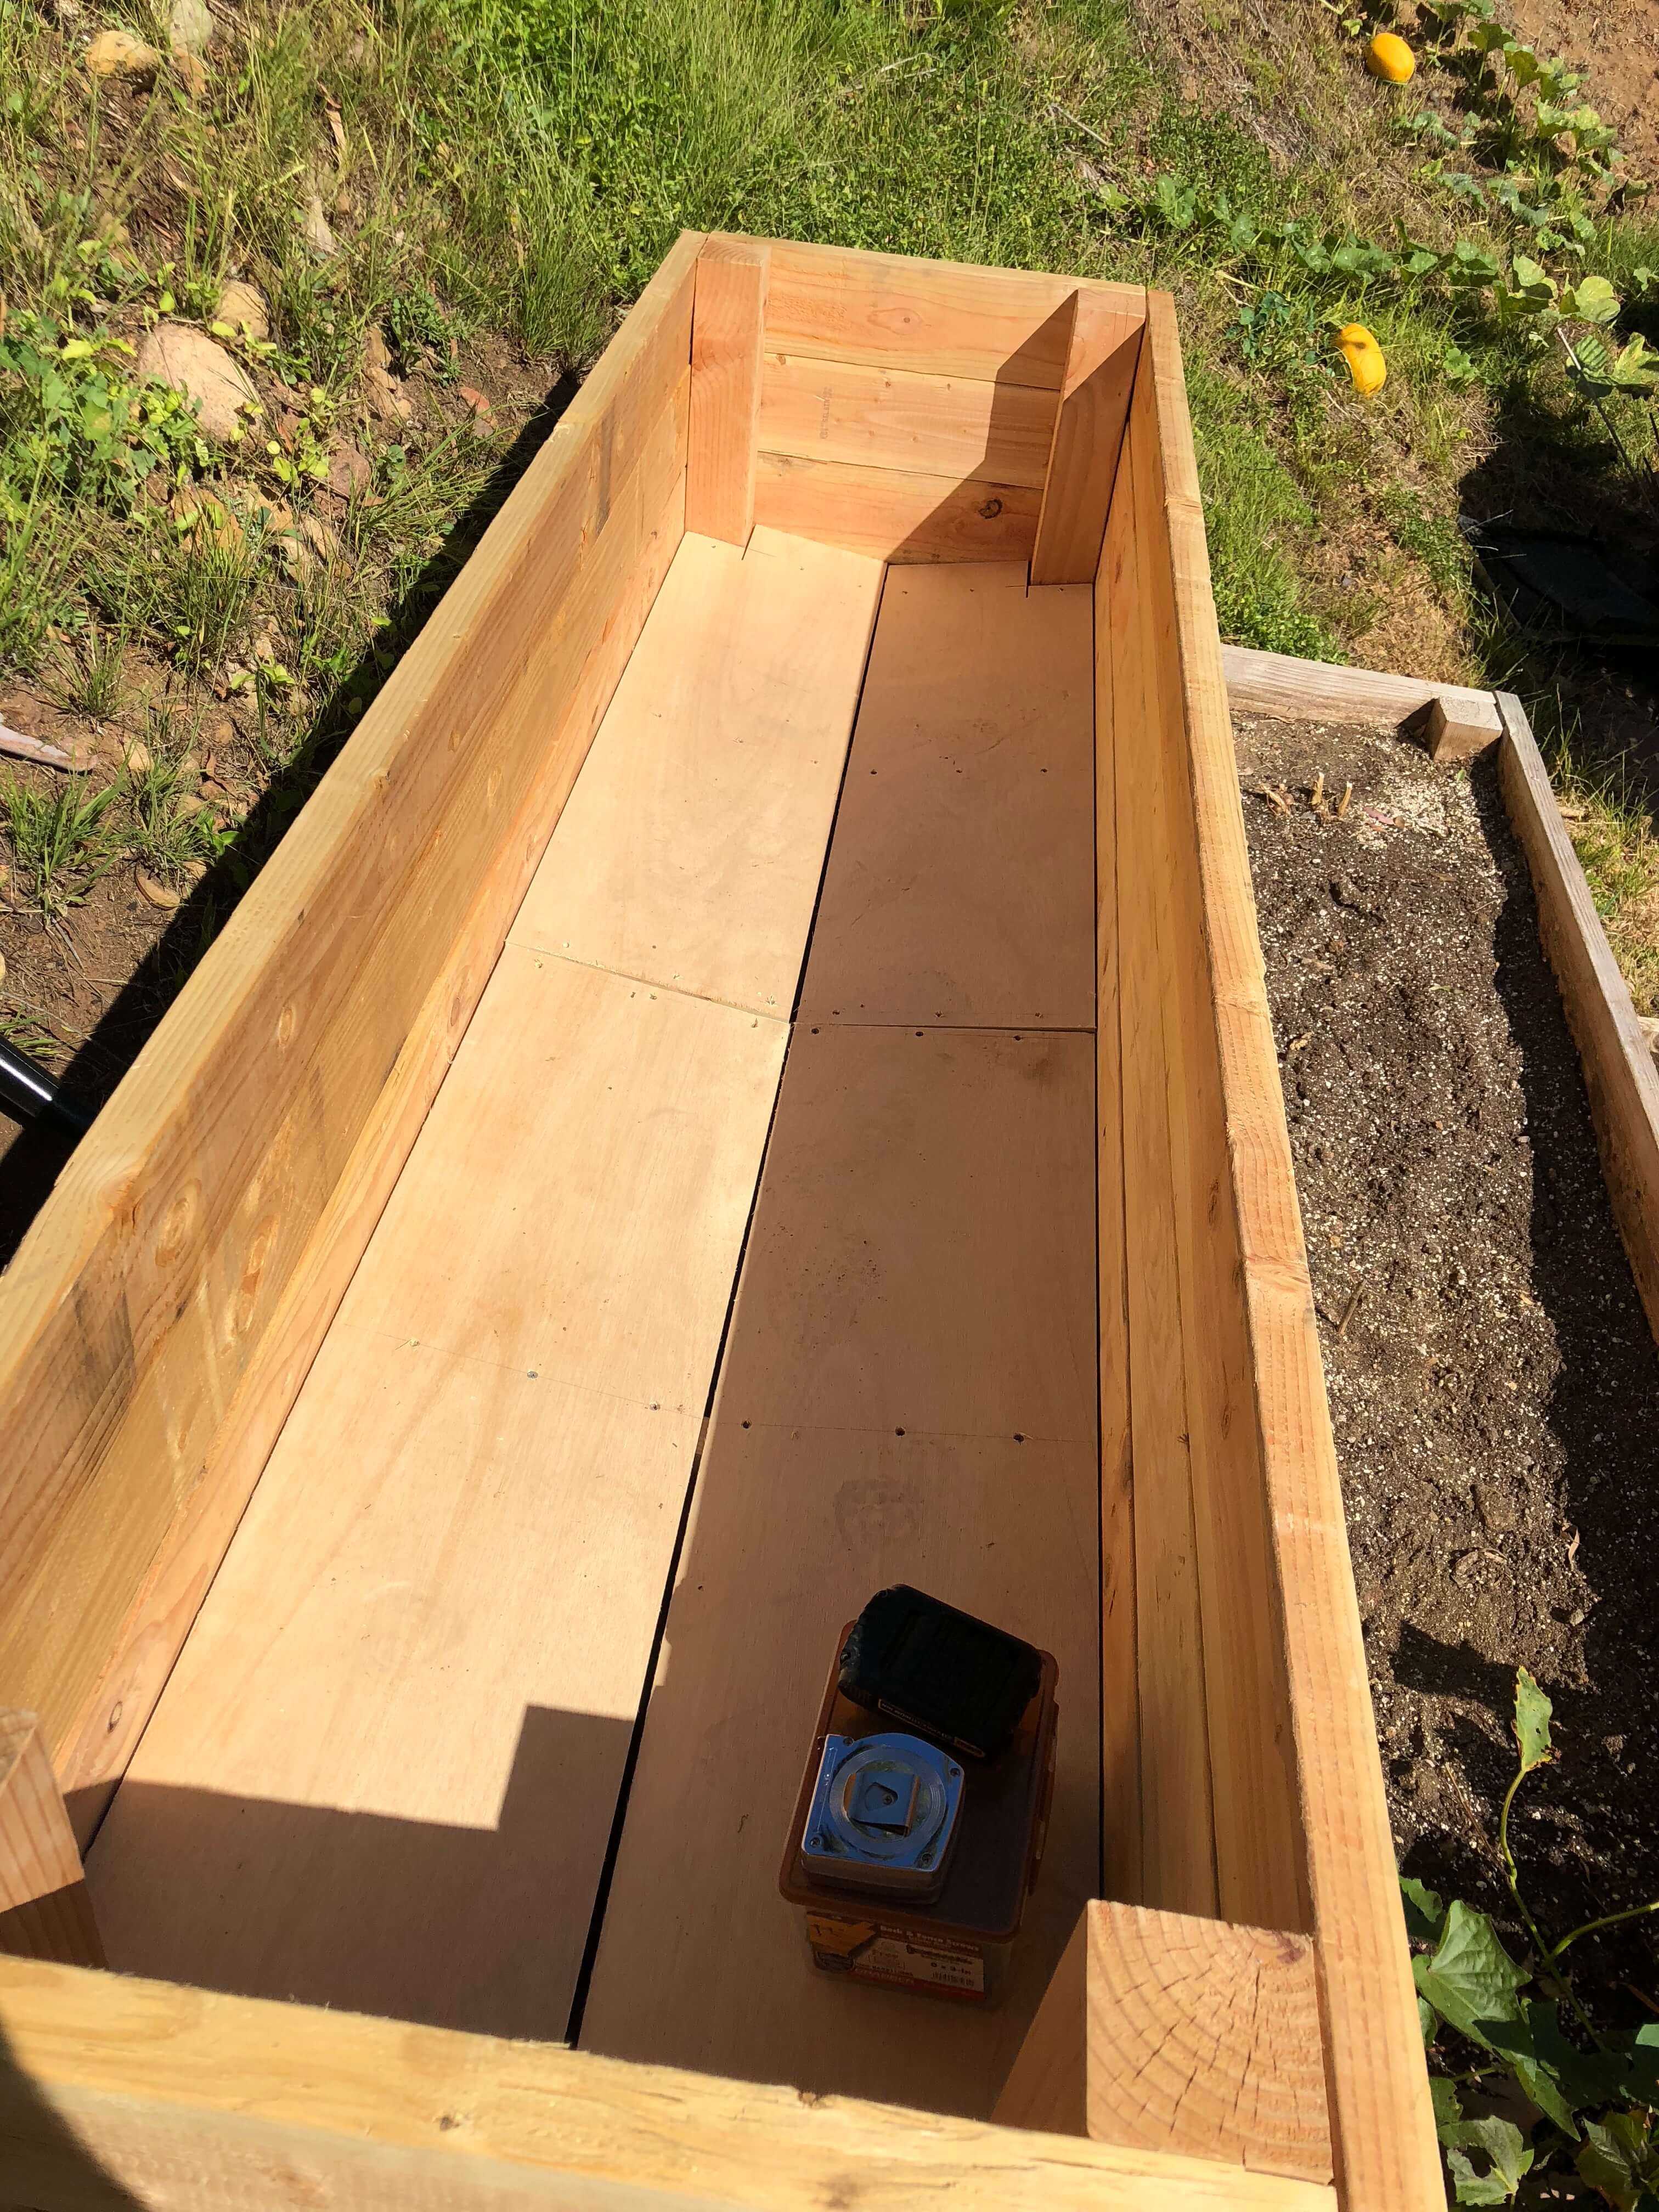
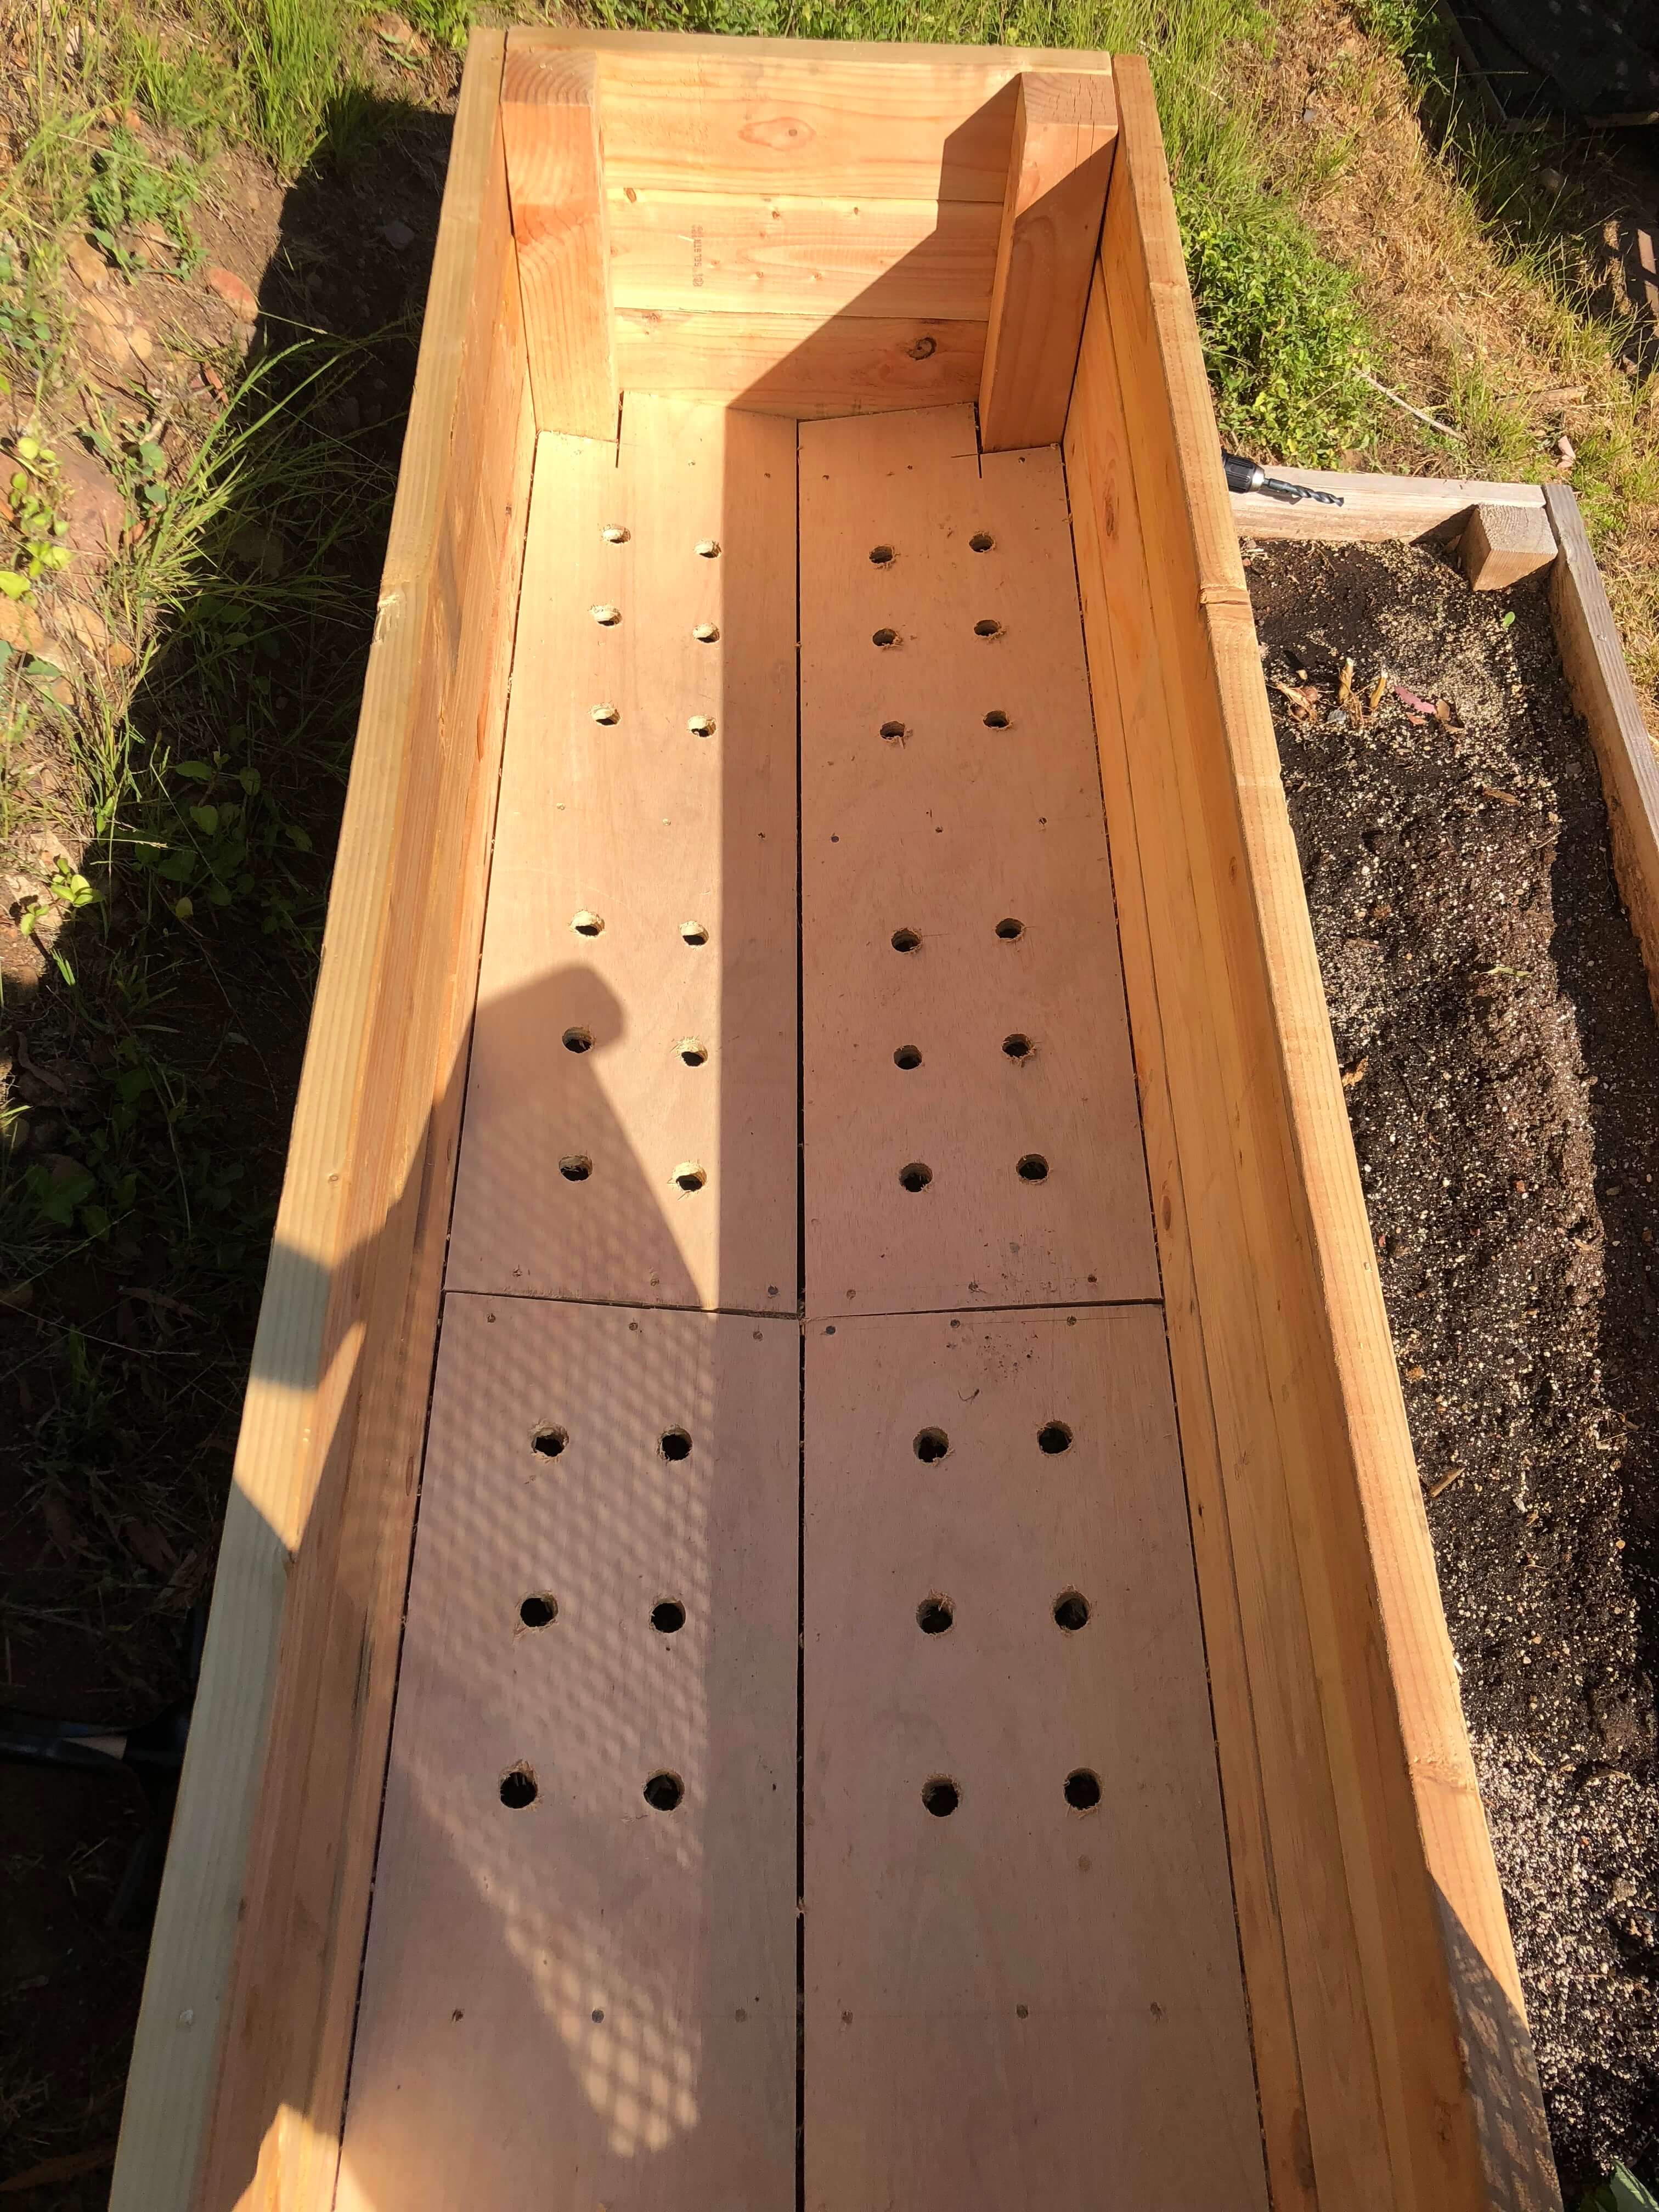
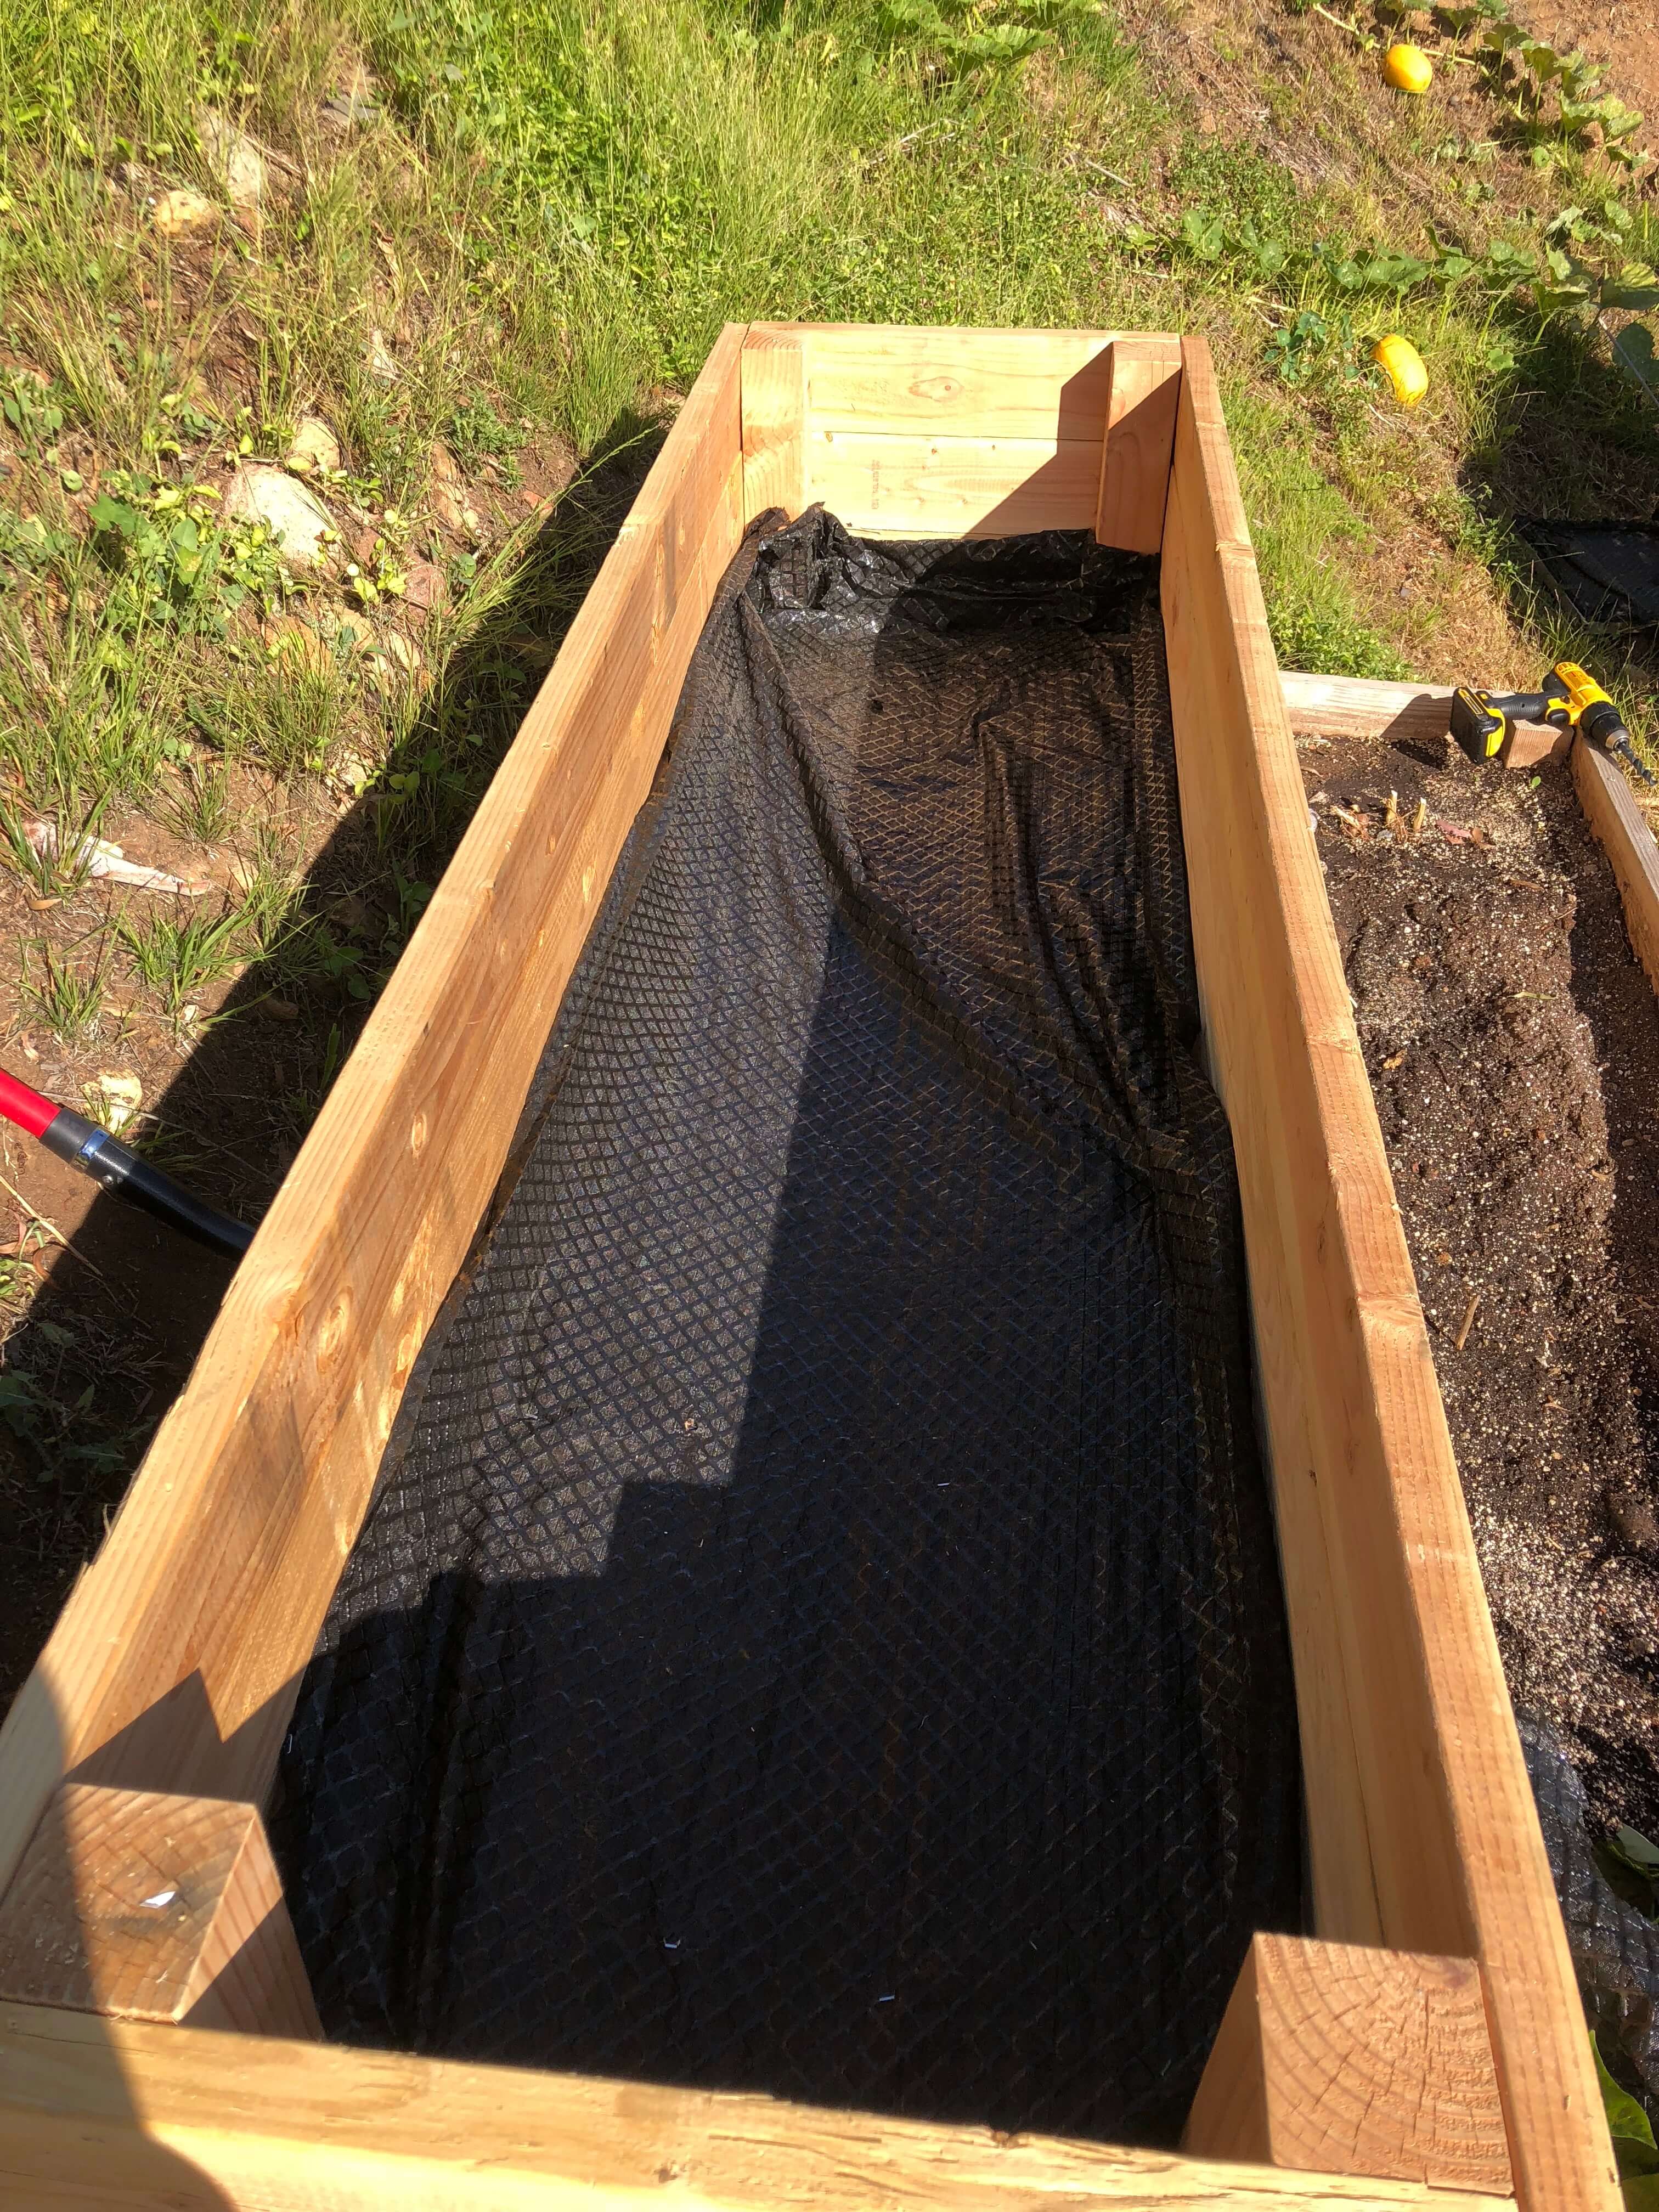
I wanted to make sure that the planter would have adequate drainage, both for the health of the plants and to keep the wood from rotting. None of this wood is pressure treated (didn't want to deal with chemicals leeching into my soil), so I took extra steps for drainage. I'm not sure how much this will help, but I decided to slant the plywood at an angle toward the middle, and leave a small gap. This way, even without the drainage holes, water will hopefully never be sitting on the wood between the holes. Maybe it'll help, maybe it won't, but by cutting a couple 2x4s diagonally and laying them on top of the flat 2x4s of the frame, it didn't take much extra time to do it this way.
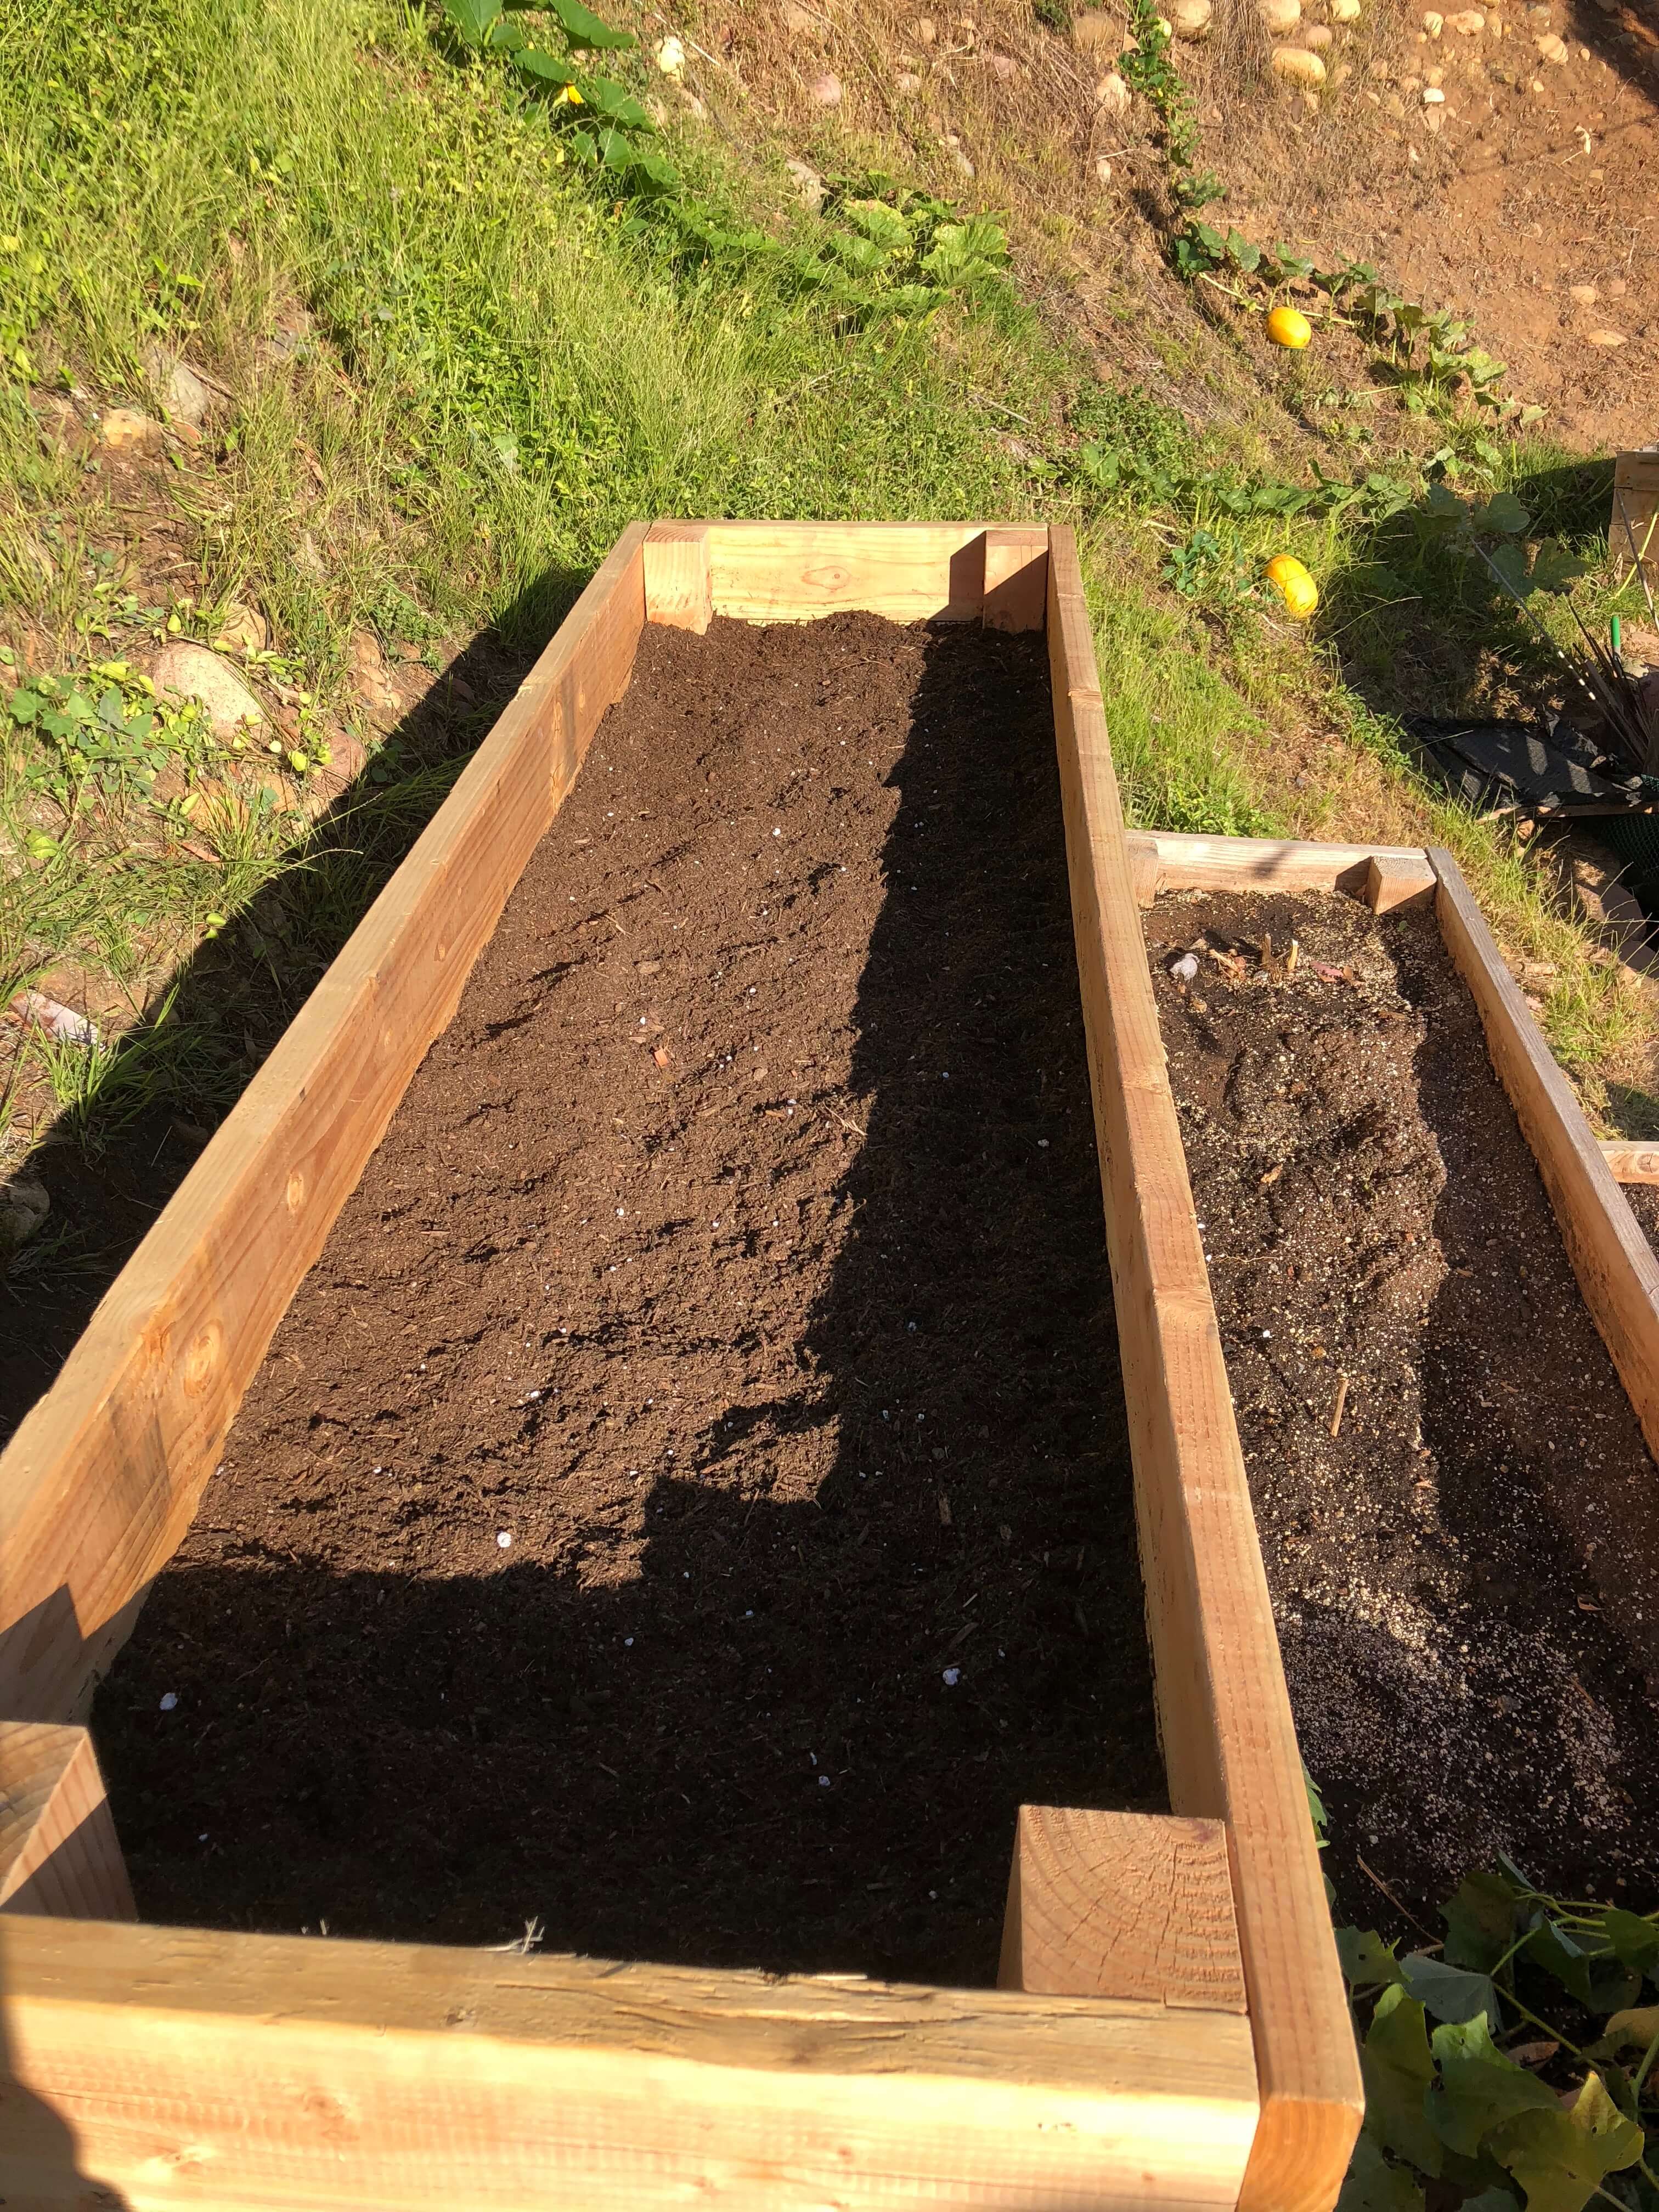
The finished product
Now that the bed is built, it's time to fill it with dirt. To save a few bucks, I used a few cubic feet of dirt from the side yard to take up volume on the bottom, and from there used about 10 cubic feet of the bagged planting mix. I mixed in one foot of compost as well.
Part ii: Building the irrigation system
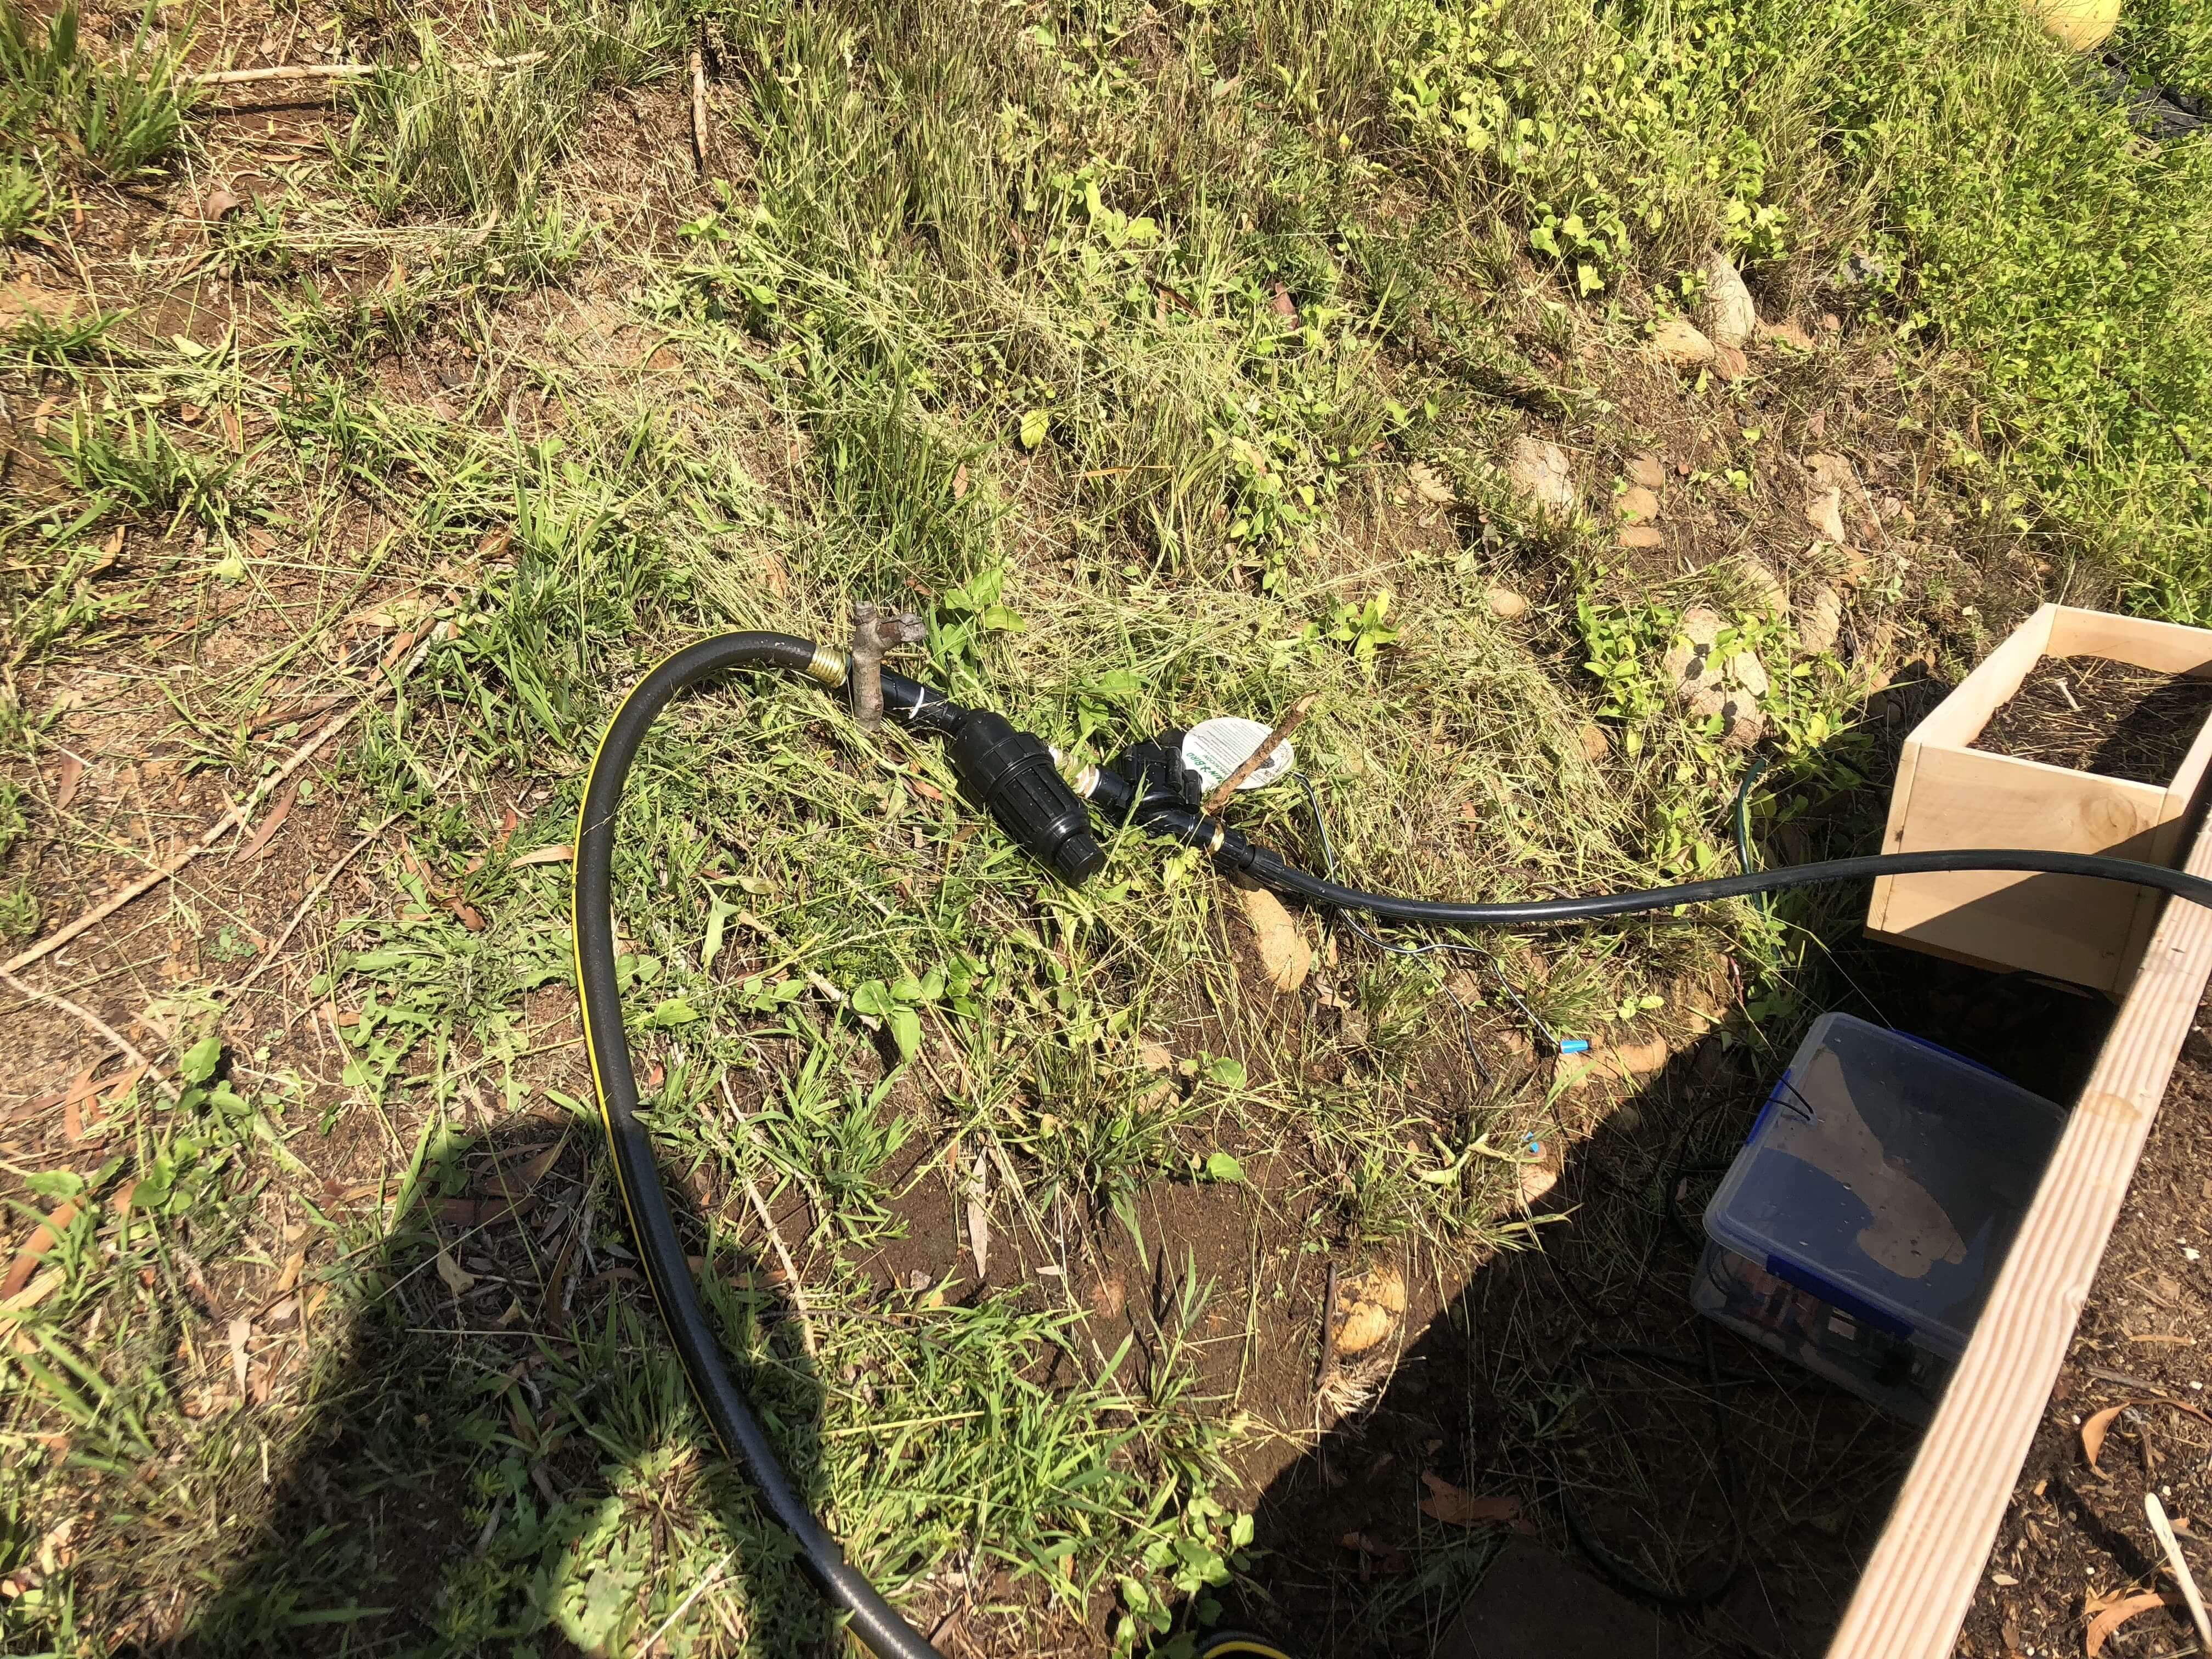
A long string of adapters
I woefully underestimated this part of the project. It wasn't at all as simple as hose->valve->drip tubing, as I initially thought. I instead spent a few days in a frenzy of adapters, researching and trying a bunch of different ones to get everything to fit together nicely.
The unsung hero of this portion of the project is thread-seal tape, aka Teflon tape. Grab a roll such as this one. It provides a water-tight seal to each connection that you make, and there are many connections for water to leak its way out.
An aside on pipe threading
One of my biggest learning experiences from the project is that in the irrigation world, there are two types of threading and they are NOT compatible. Further, there are several initialisms for each type, which led to a lot of confusion early on. Generally, they are:
Hose threading:
Most garden hoses (as well as most of the parts on my list) are compatible with the standard 3/4" garden hose threading, or GHT. Since there are male and female ends to a hose, you also may see things labeled as MHT (male hose thread) or FHT (female hose thread) to further describe what threading you should expect. (As a side note, even though most garden hoses use 3/4" GHT, the diameter of the hose itself is often only 5/8". Don't let that trip you up in shopping for parts.)
Pipe threading:
Many/most residential sprinkler systems rely on underground water flow, which is something better left to PVC piping for structure and longevity compared with your standard garden hose. As such, there is also national pipe thread, or NPT, to contend with. The only piece of my system that deals in pipe thread is the solenoid valve itself, which is just an off-the-shelf Rainbird product meant for sprinkler systems.
TL;DR: if you see an H (like GHT or MHT), it means hose threading; if you see a P, it is pipe threading. In my project, all fittings are for 3/4" diameter (until we get to the actual drip system).
Plumbing parts list
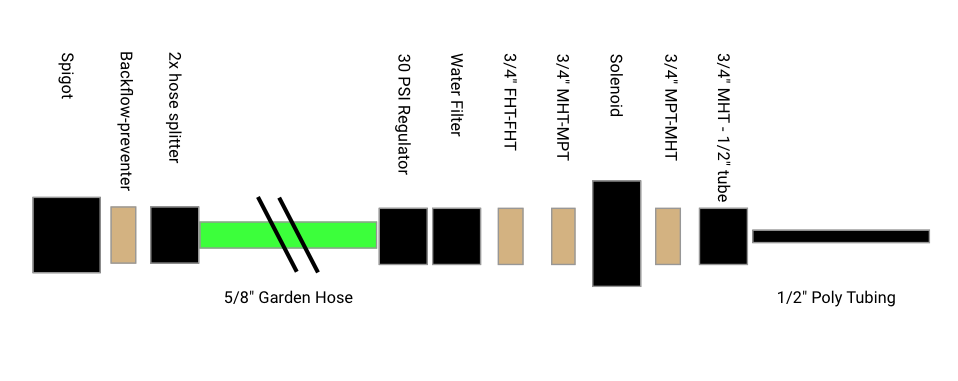
Here is a list of the parts needed and the purpose of each. I've arranged them in the order that they are attached (starting from the outdoor water spigot to the raised bed).
3/4" Vacuum breaker / backflow restrictor link
First up, this piece allows water to flow in one direction only. It keeps the dirty water from your irrigation system from accidentally flowing back into the source, which sounds like a pain and something best avoided wih one small, cheap part. Apparently backflow like this is possible, and the internet recommends that your sprinkler system have one.
Garden hose 2-way splitter link
I already have a general-purpose garden hose out in the backyard, and one goal of the project was modularity and to minimize changes to the existing backyard. Also, this splitter allows either or both hoses to be fully closed off to water, which is essential for testing.
75' Heavy-duty garden hose
I want my system to be portable. If I were to relocate and set up a new garden, I'd like to keep and reuse as much of this system as possible, and minimize having to dig up parts from underground. Plus, since this is v1, I want to leave plenty of room for error. So in this instance, an above-ground malleable garden hose beats out PVC piping any day.
30PSI pressure regulator link
We've now entered into the start of the sprinkler system. There's a lot of pressure pumping through our outdoor spigot, and most household irrigation systems prefer a lower (and more stable) 30PSI - this piece regulates the flow, and so it sits at the front of the line.
Water filter link
Debris may not seem like a big deal with your standard 5/8" garden hose, but this water is eventually flowing through 1/4" poly tubing and tiny 0.5GPH drip emitters - we definitely want to prevent any large particles from flowing through our system and causing clogs.
The solenoid valve
Note: there are many approaches to adapters that would work here. I suggest drawing it out and making a decision based on your goals. For example, I opted for a system where all adapter pieces were available on Amazon Prime for expediency. There may be a simpler/cheaper/etc approach.
3/4" FHT-FHT adapters link
The problem we're solving is that most pieces in this pipeline deal with hose threading, except for the solenoid valve, which has pipe threading. In this instance both threadings are for 3/4" diameter and look incredibly similar, but I promise that one will not connect reliably to the other. I only was able to find a conversion from male to male ends on Amazon, so this piece was necessary to support the following.
3/4" MHT-MPT link
Finally, the piece which changes our threading from hose to pipe.
3/4" In-line valve link
The star of the show! We are controlling this piece via the Pi to open/close the solenoid valve and run water through our system. Note that it requires pipe threading rather than hose threading, which is the reason we need all the other adapters. Take note of the power supply required for this piece. In my case, it's a 24VAC adapter.
3/4" MHT-MPT
The same piece as before, back again. I have to get from pipe threading back to hose threading, to support the last adapter.
3/4" FHT - 1/2" drip link
This piece connects a standard garden hose to a 1/2" poly tubing, which forms the backbone of the drip system. The previous adapter brought us back to using hose threading to support it. I chose to use drip irrigation, but the system up until this point can be used for any manner of watering, such as a sprinkler or a soaker system. You would substitute this part with whatever is needed for the rest of your system.
Drip irrigation
I used a kit from Rainbird for the last mile of the system. It's called a "47 piece gardener's drip kit" if you want to find something similar. Mainly, you'll need some 1/2" poly tubing for the spine of the irrigation, some 1/4" tubing to get to individual plants, and some types of drip emitters to output the water. My kit came with 3 types of emitter: 0.5GPH (gallon per hour), 1GPH, and 2GPH. I found that 0.5GPH is a good amount for seedlings, 1GPH for most of the vegetables, and 2GPH for some of the larger ones like the squash and cucumber plants. I more or less winged it as far as how to lay this part out, and so you'd probably be better served watching a few YouTube videos on how to do it efficiently.
Part iii: Programming the Pi
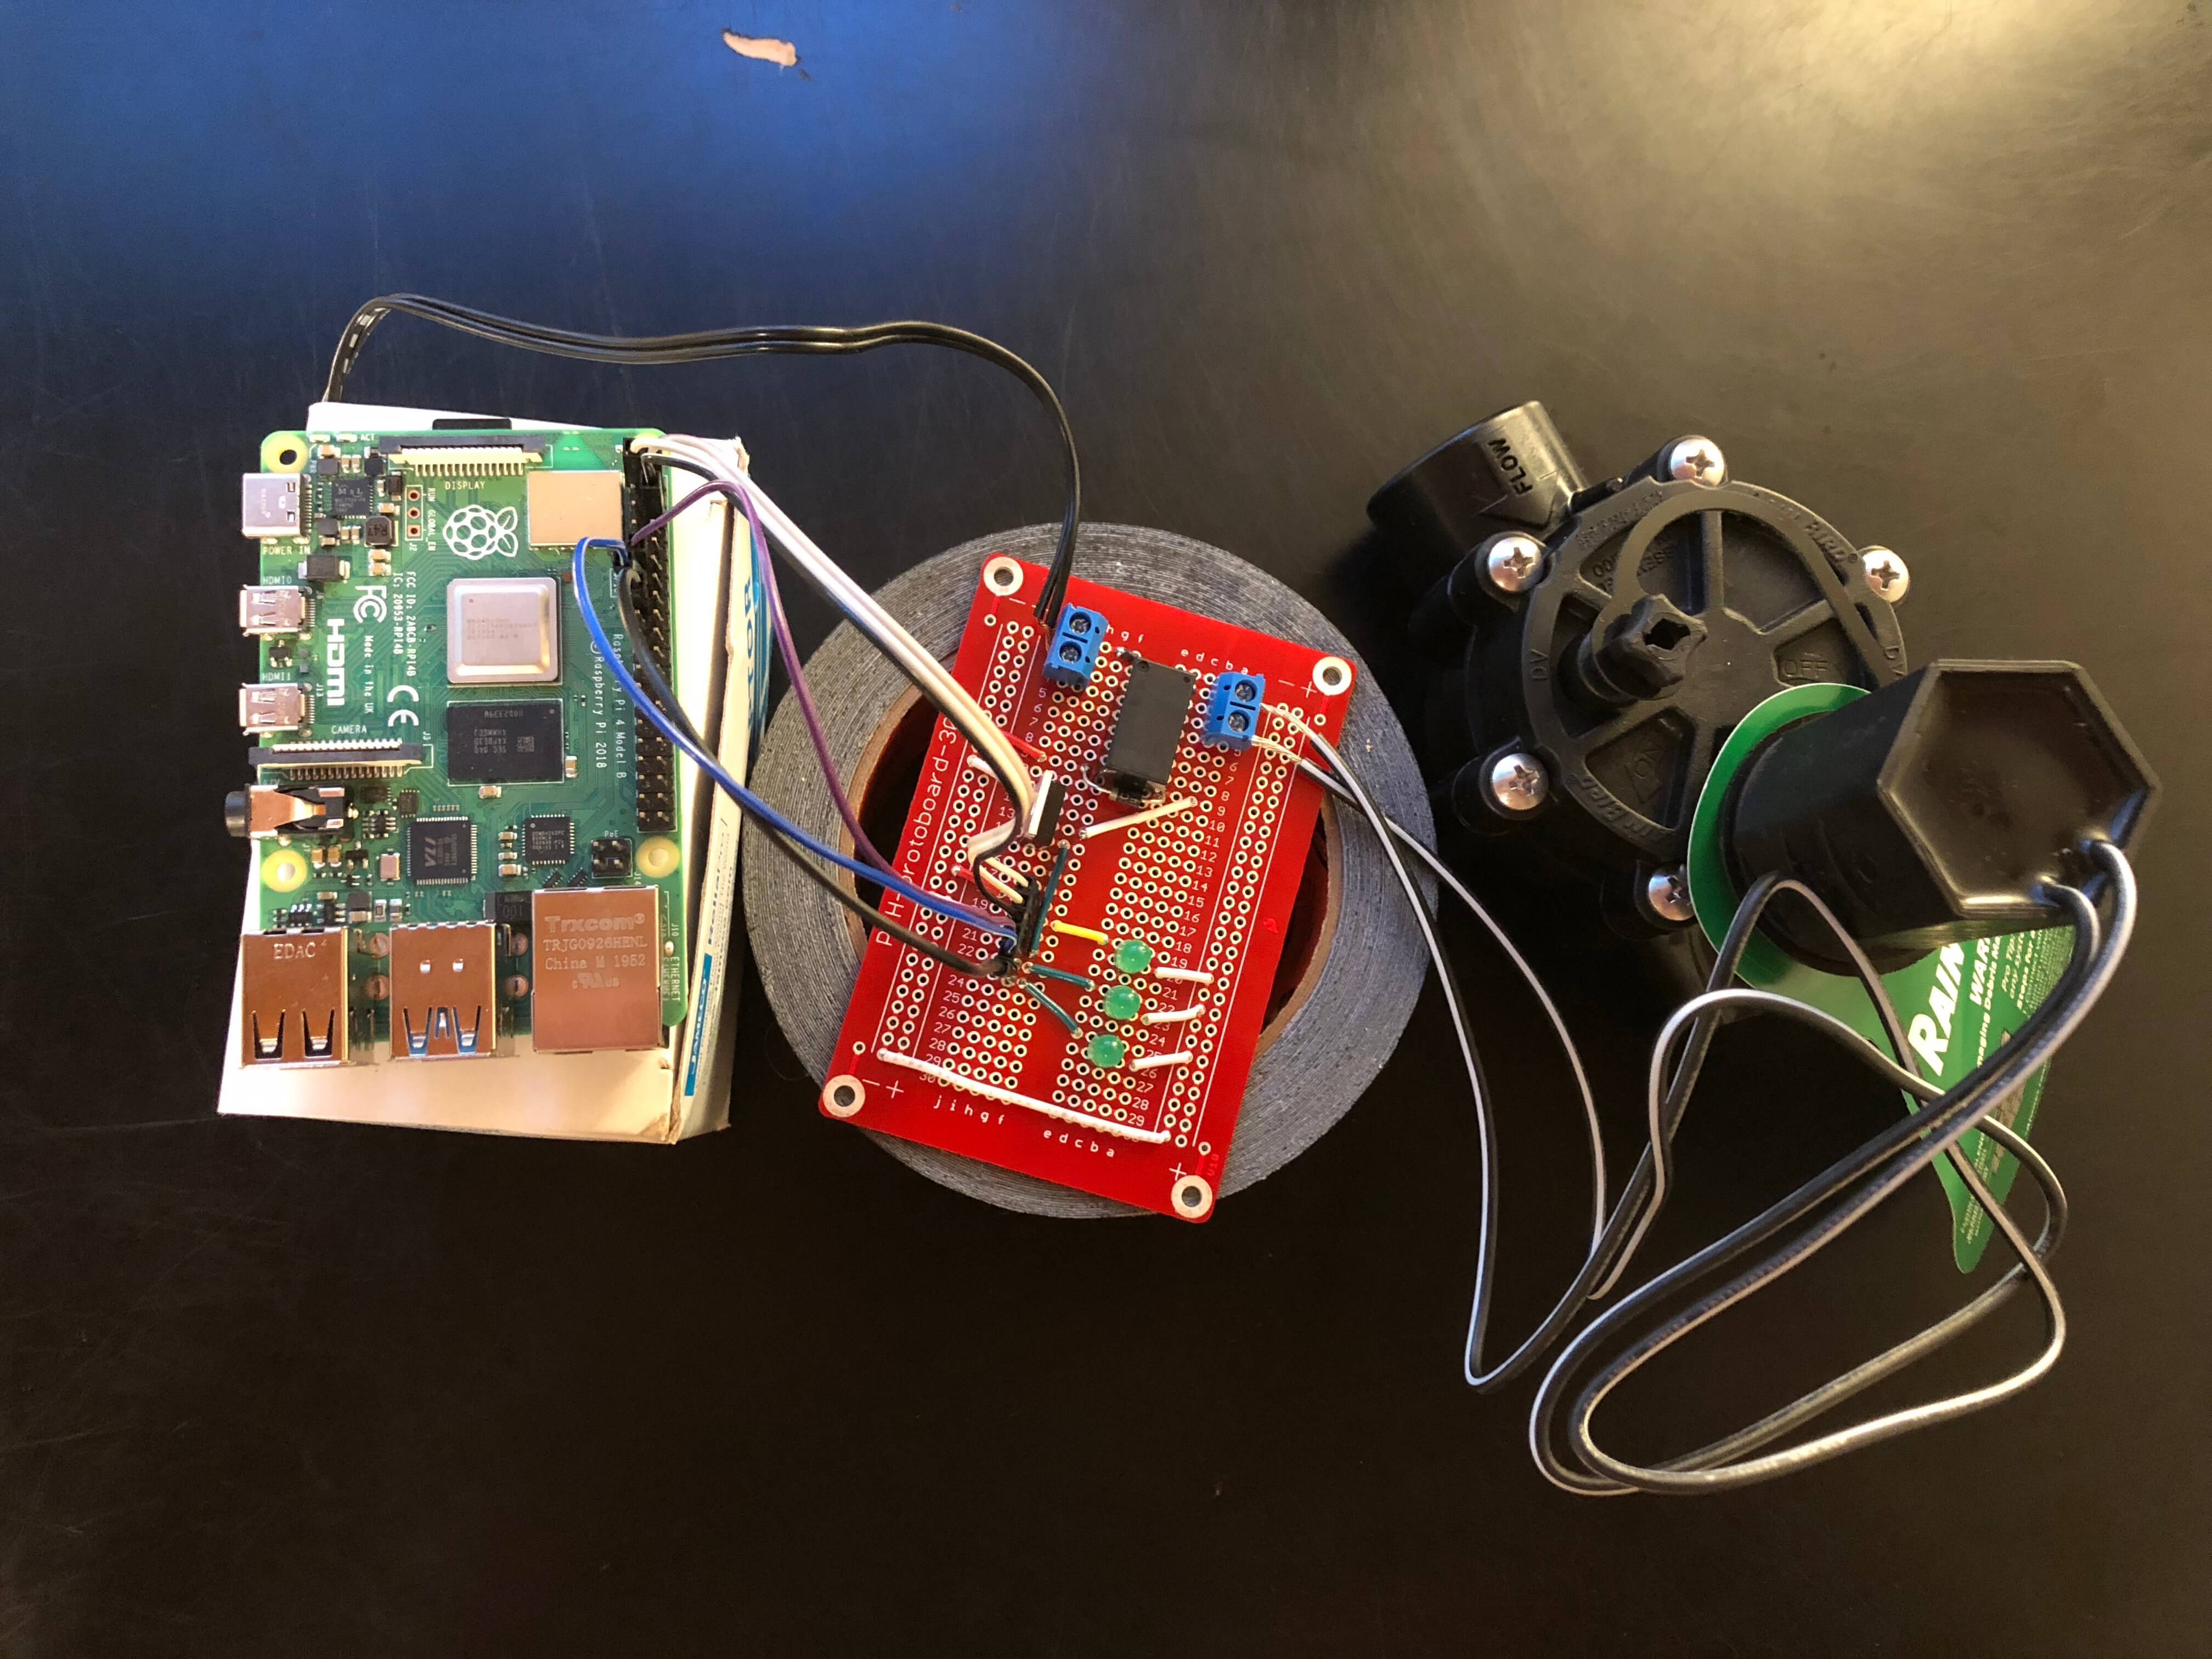
The complete soldered circuit and solenoid valve
This writeup assumes some beginner to intermediate knowledge of both embedded systems and programming a Raspberry Pi. This project consists of a relatively simple circuit board and a python3 script which is run by a cron task. At its heart, the board uses one of its GPIO pins to output a signal to control the solenoid valve. However, unlike a LED (or something similar), the ~3.3V coming out of a Pi's pin is not nearly enough to power something like a solenoid valve (plus my valve is AC, not DC). So the circuit relies on a transistor and a relay. The Pi outputs its relatively small signal to the transistor, which powers the relay, which is able to turn a small signal into one large enough to actually power the solenoid valve. As such, there are 2 power systems involved. One powers the Pi itself, and another is the 24VAC power adapter that is needed to run my valve, and this is the part that is controlled by the relay.
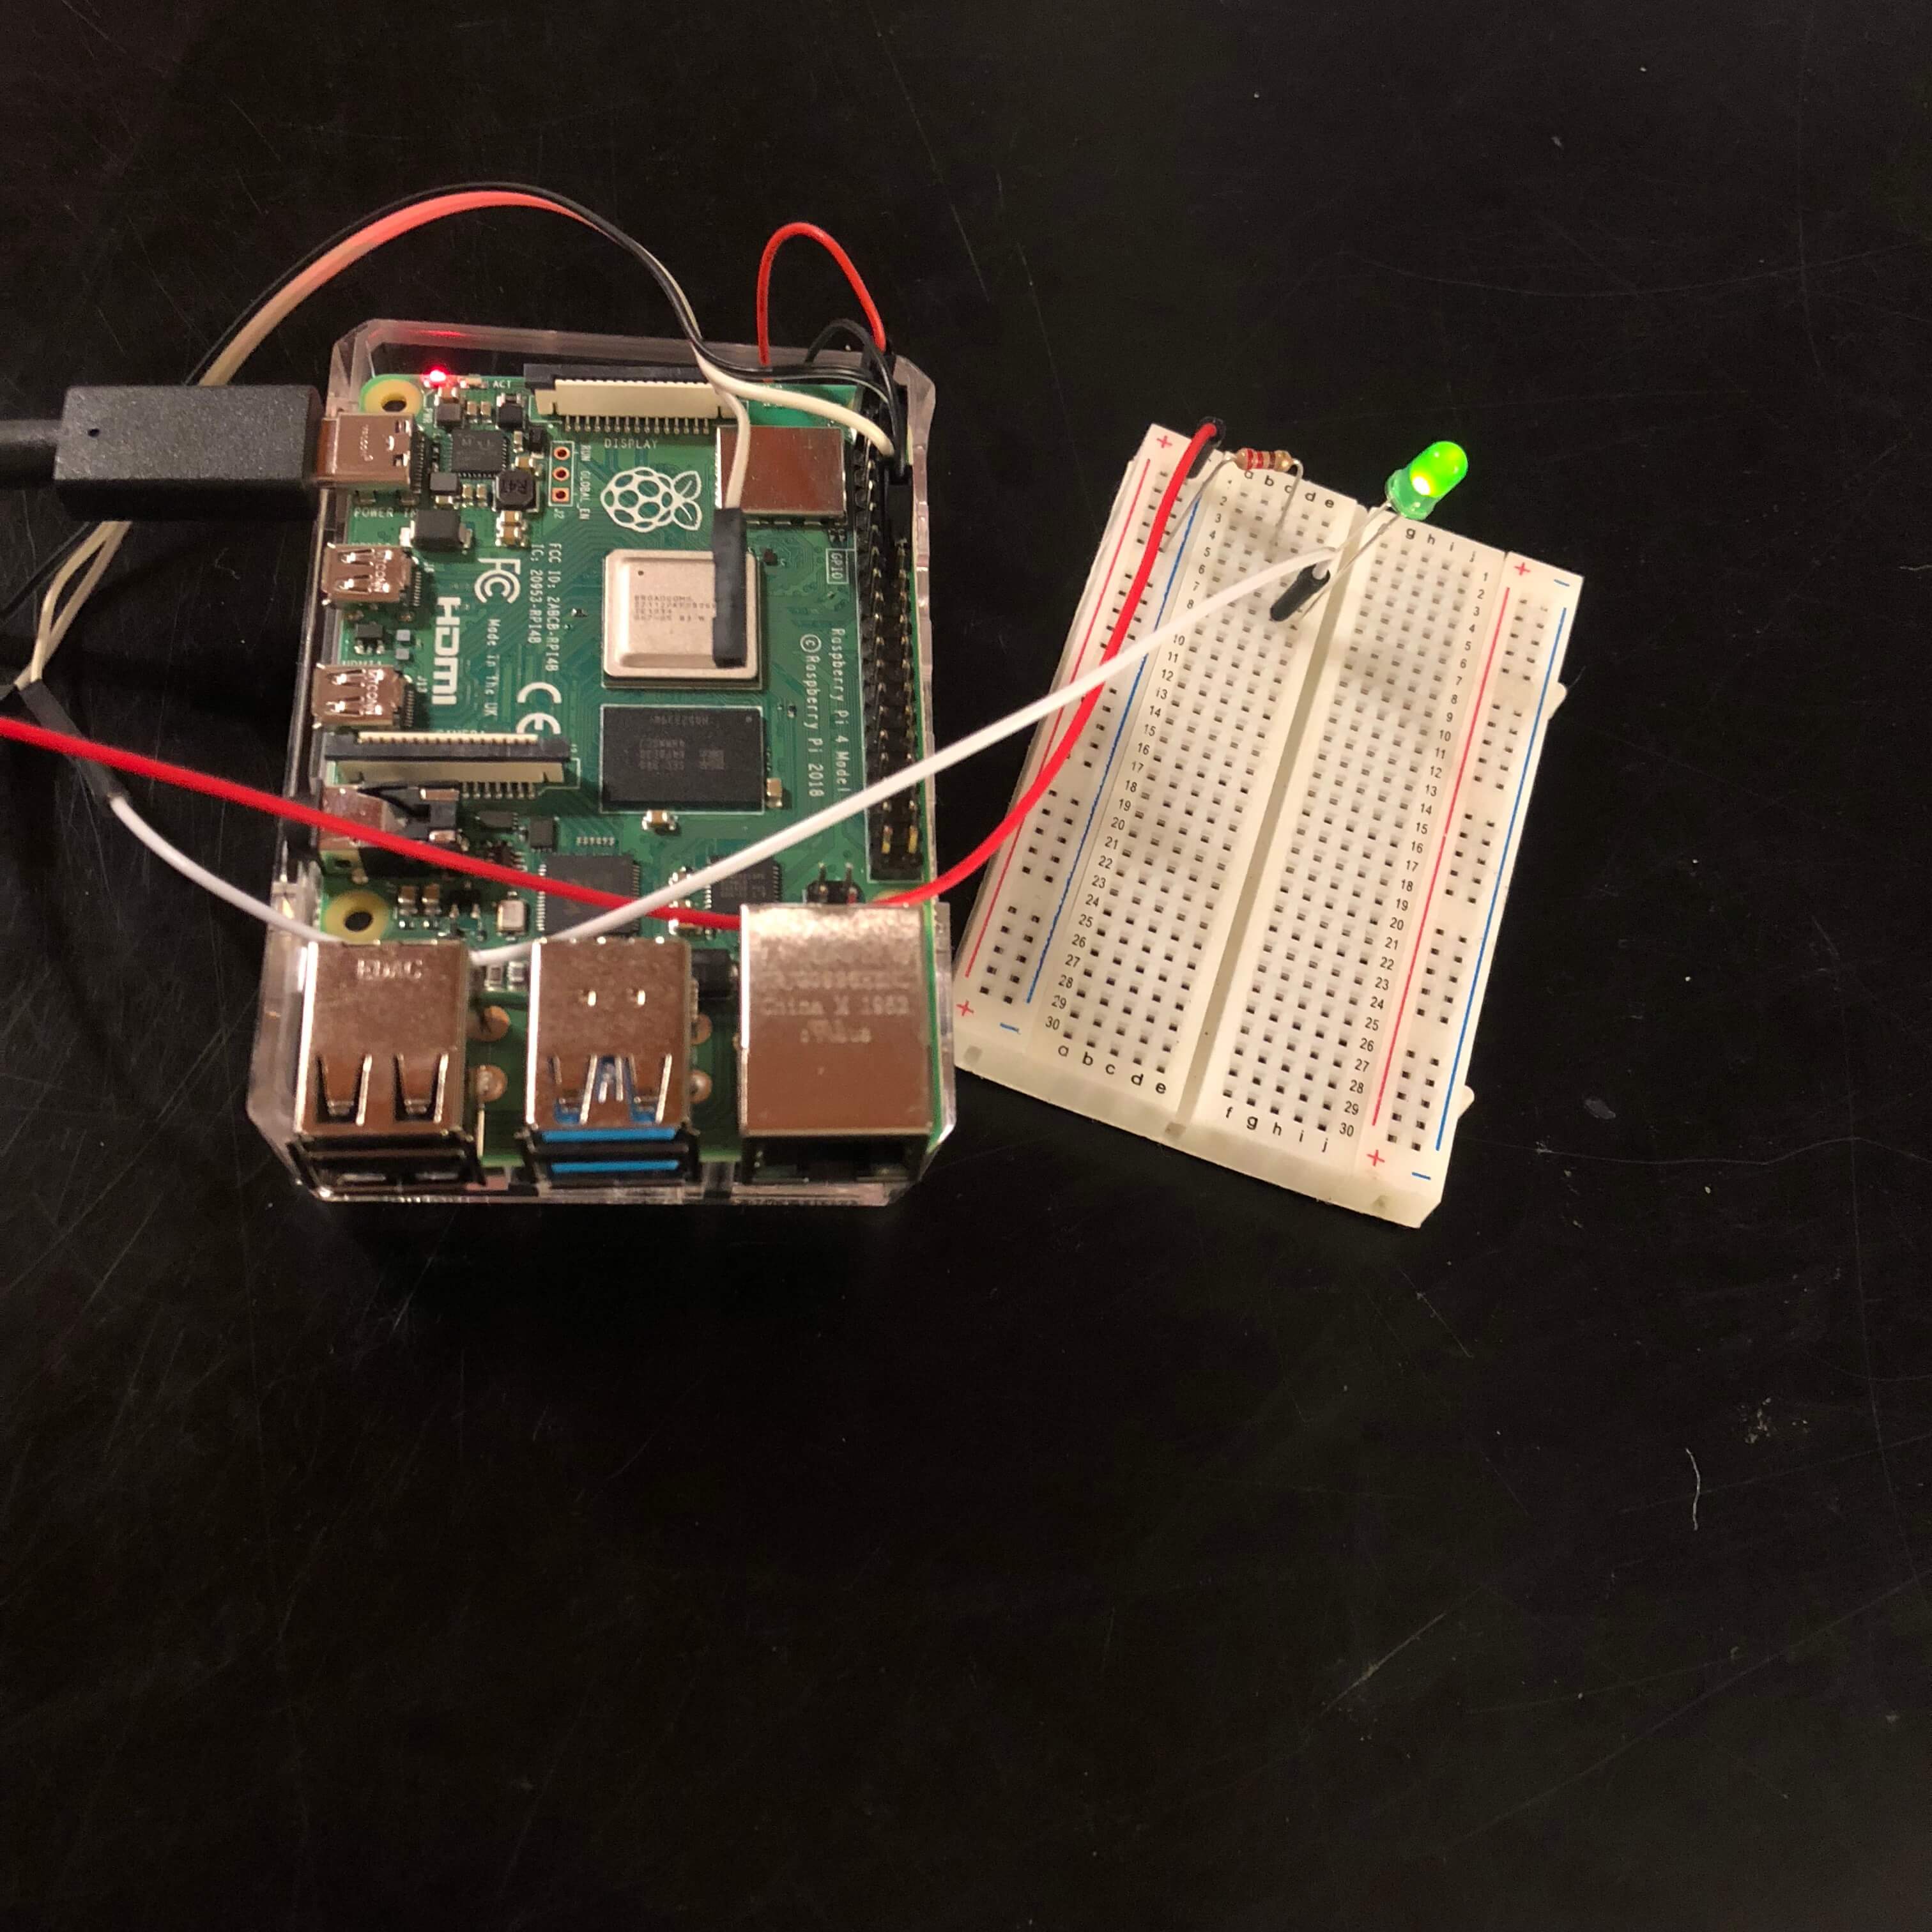
The obligatory "blink an LED" after setting up the Pi
The system is set up with a simple python script which is run in the morning by a cron job (sudo crontab -e). In code, turning the sprinkler on and off isn't any more complicated than turning an LED on/off, so we're almost there. One gotcha I noticed when setting up my crontab is that the Pi comes shipped on GMT time, and so you'll need to change the system timezone and reboot if your system is anywhere else.
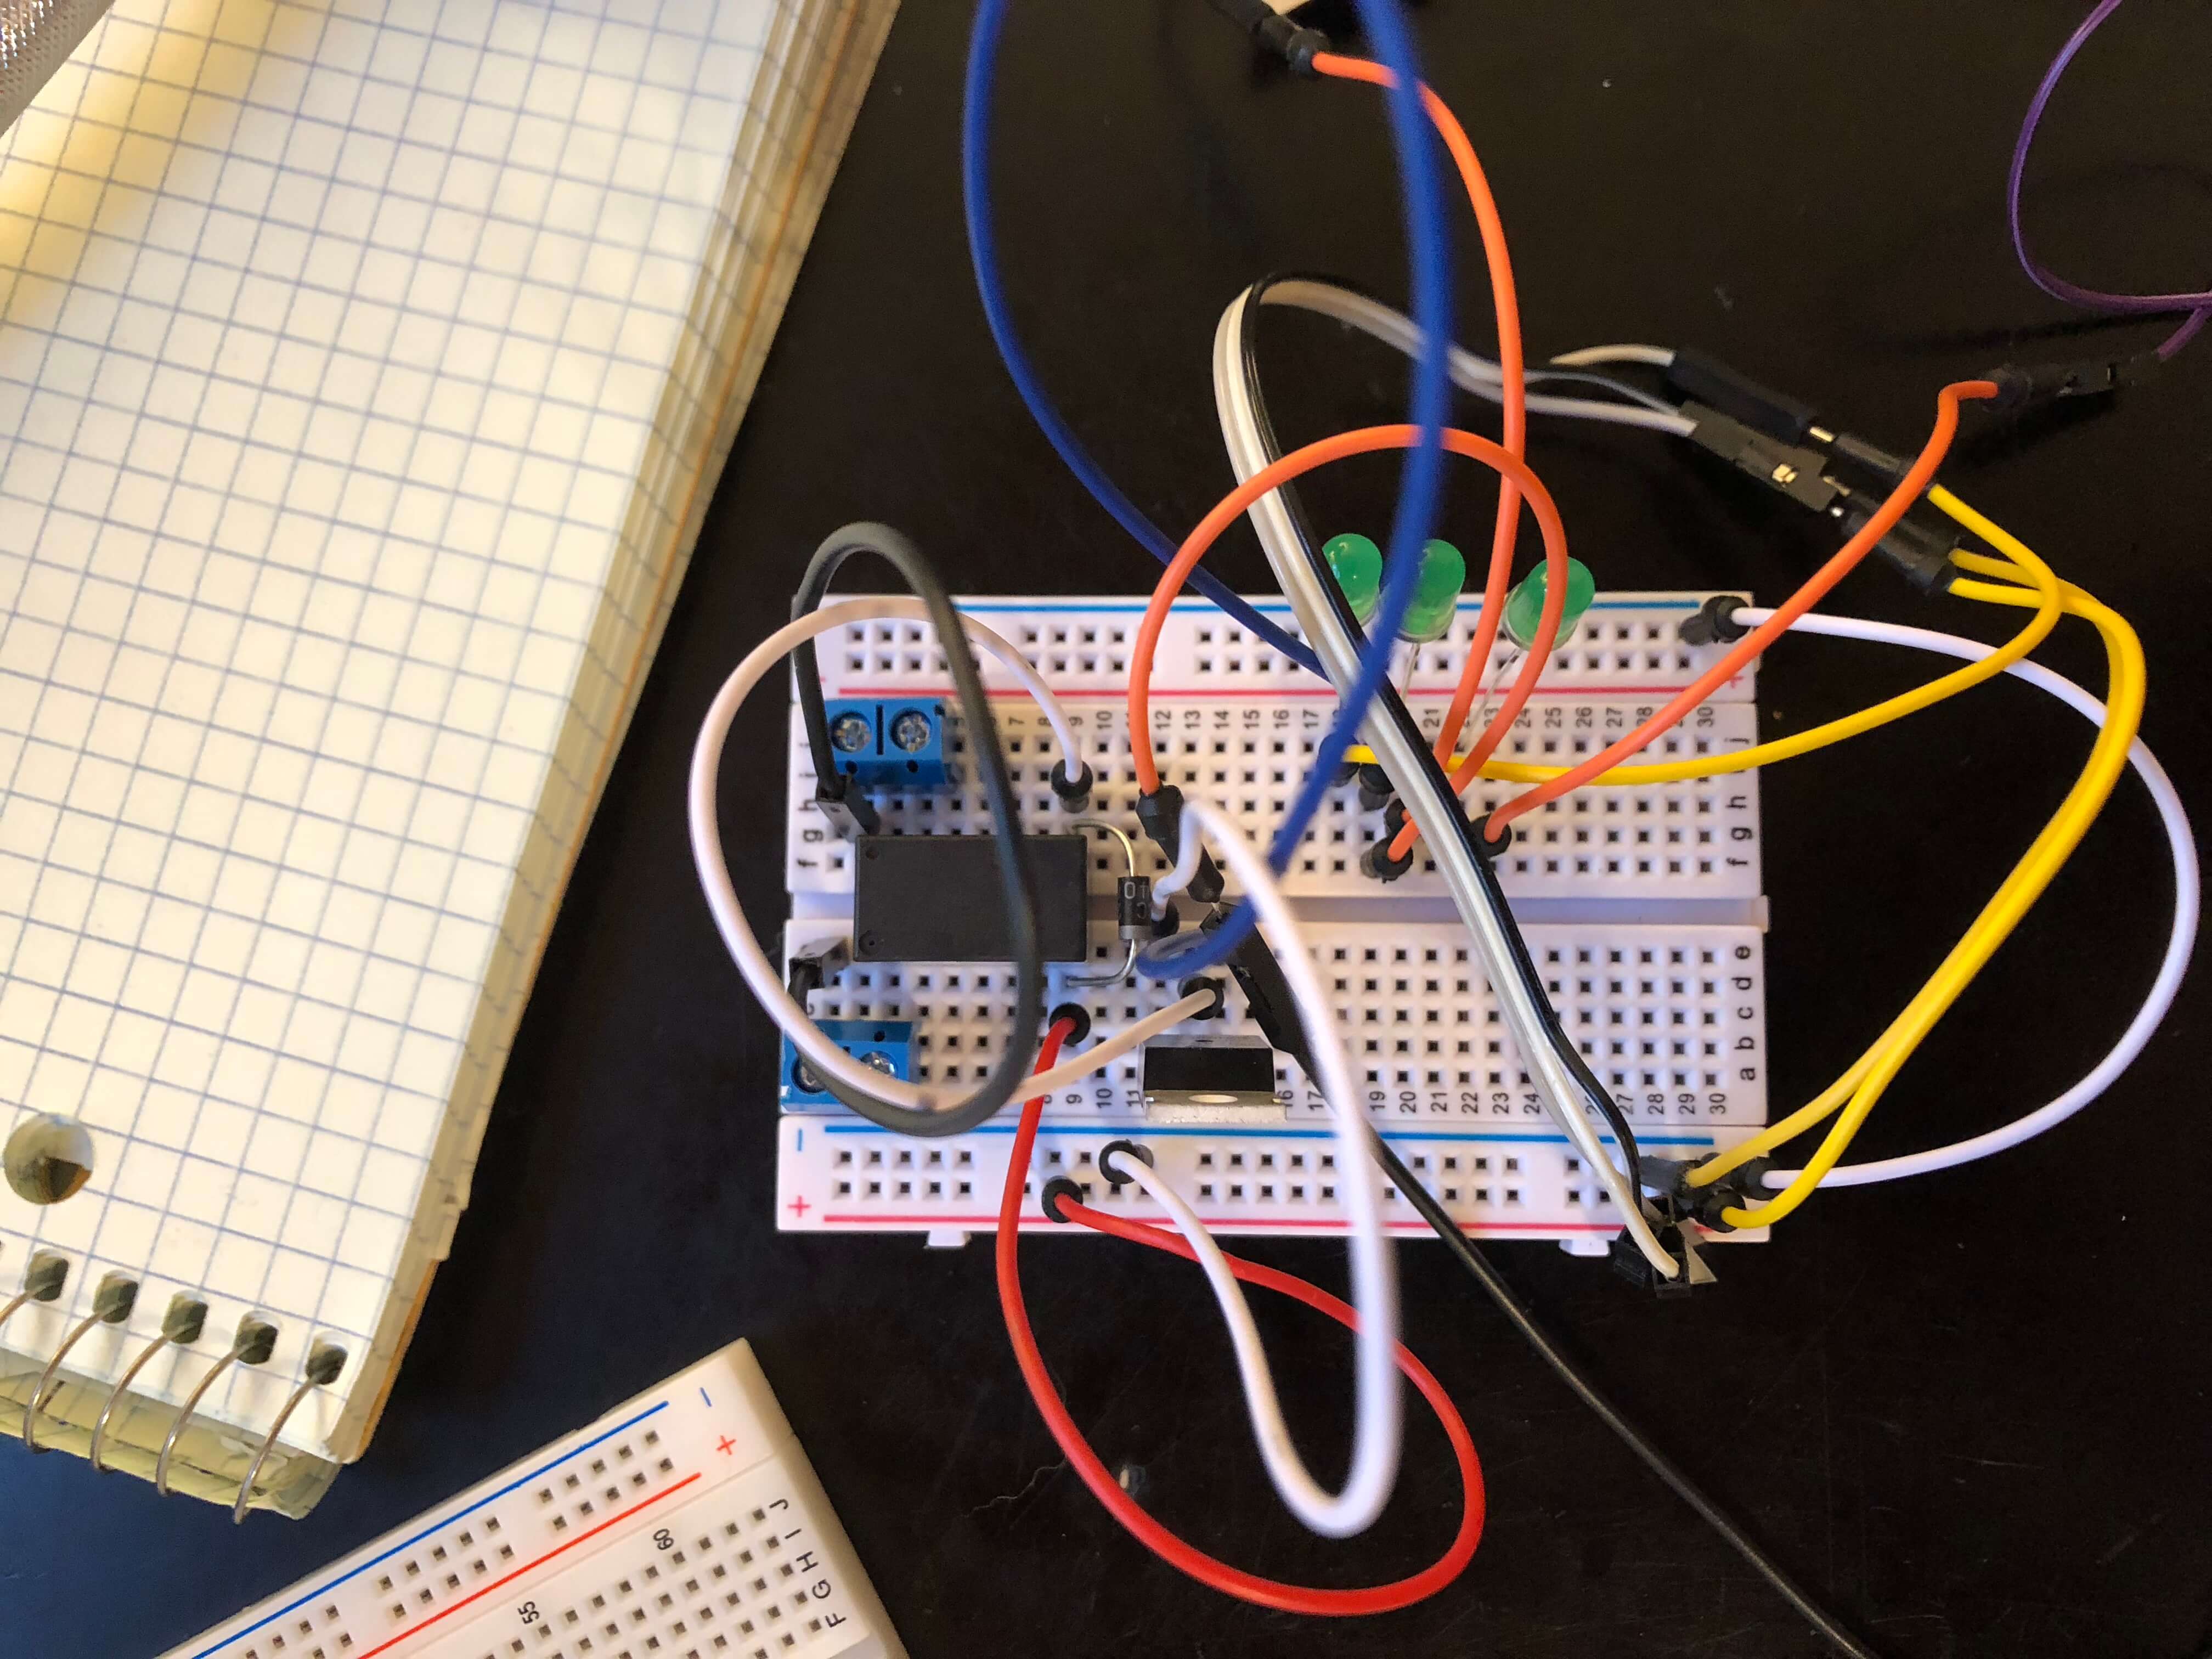
Testing the main circuit on a breadboard
This is a pretty simple circuit, as far as circuits go. Pin 17 of the Pi goes to a transistor which is used to give current to the relay, which is responsible for powering the solenoid valve on/off. There are several LEDs on the board - one connects directly to the 3.3V output of the Pi to show that the system is on, and the second powers on whenever the valve is open. I don't have a use for the third LED yet.
I used this solderable breadboard to mount the components. I like using these when space isn't an issue because it's sturdy and you can map your design directly from the breadboard to it.
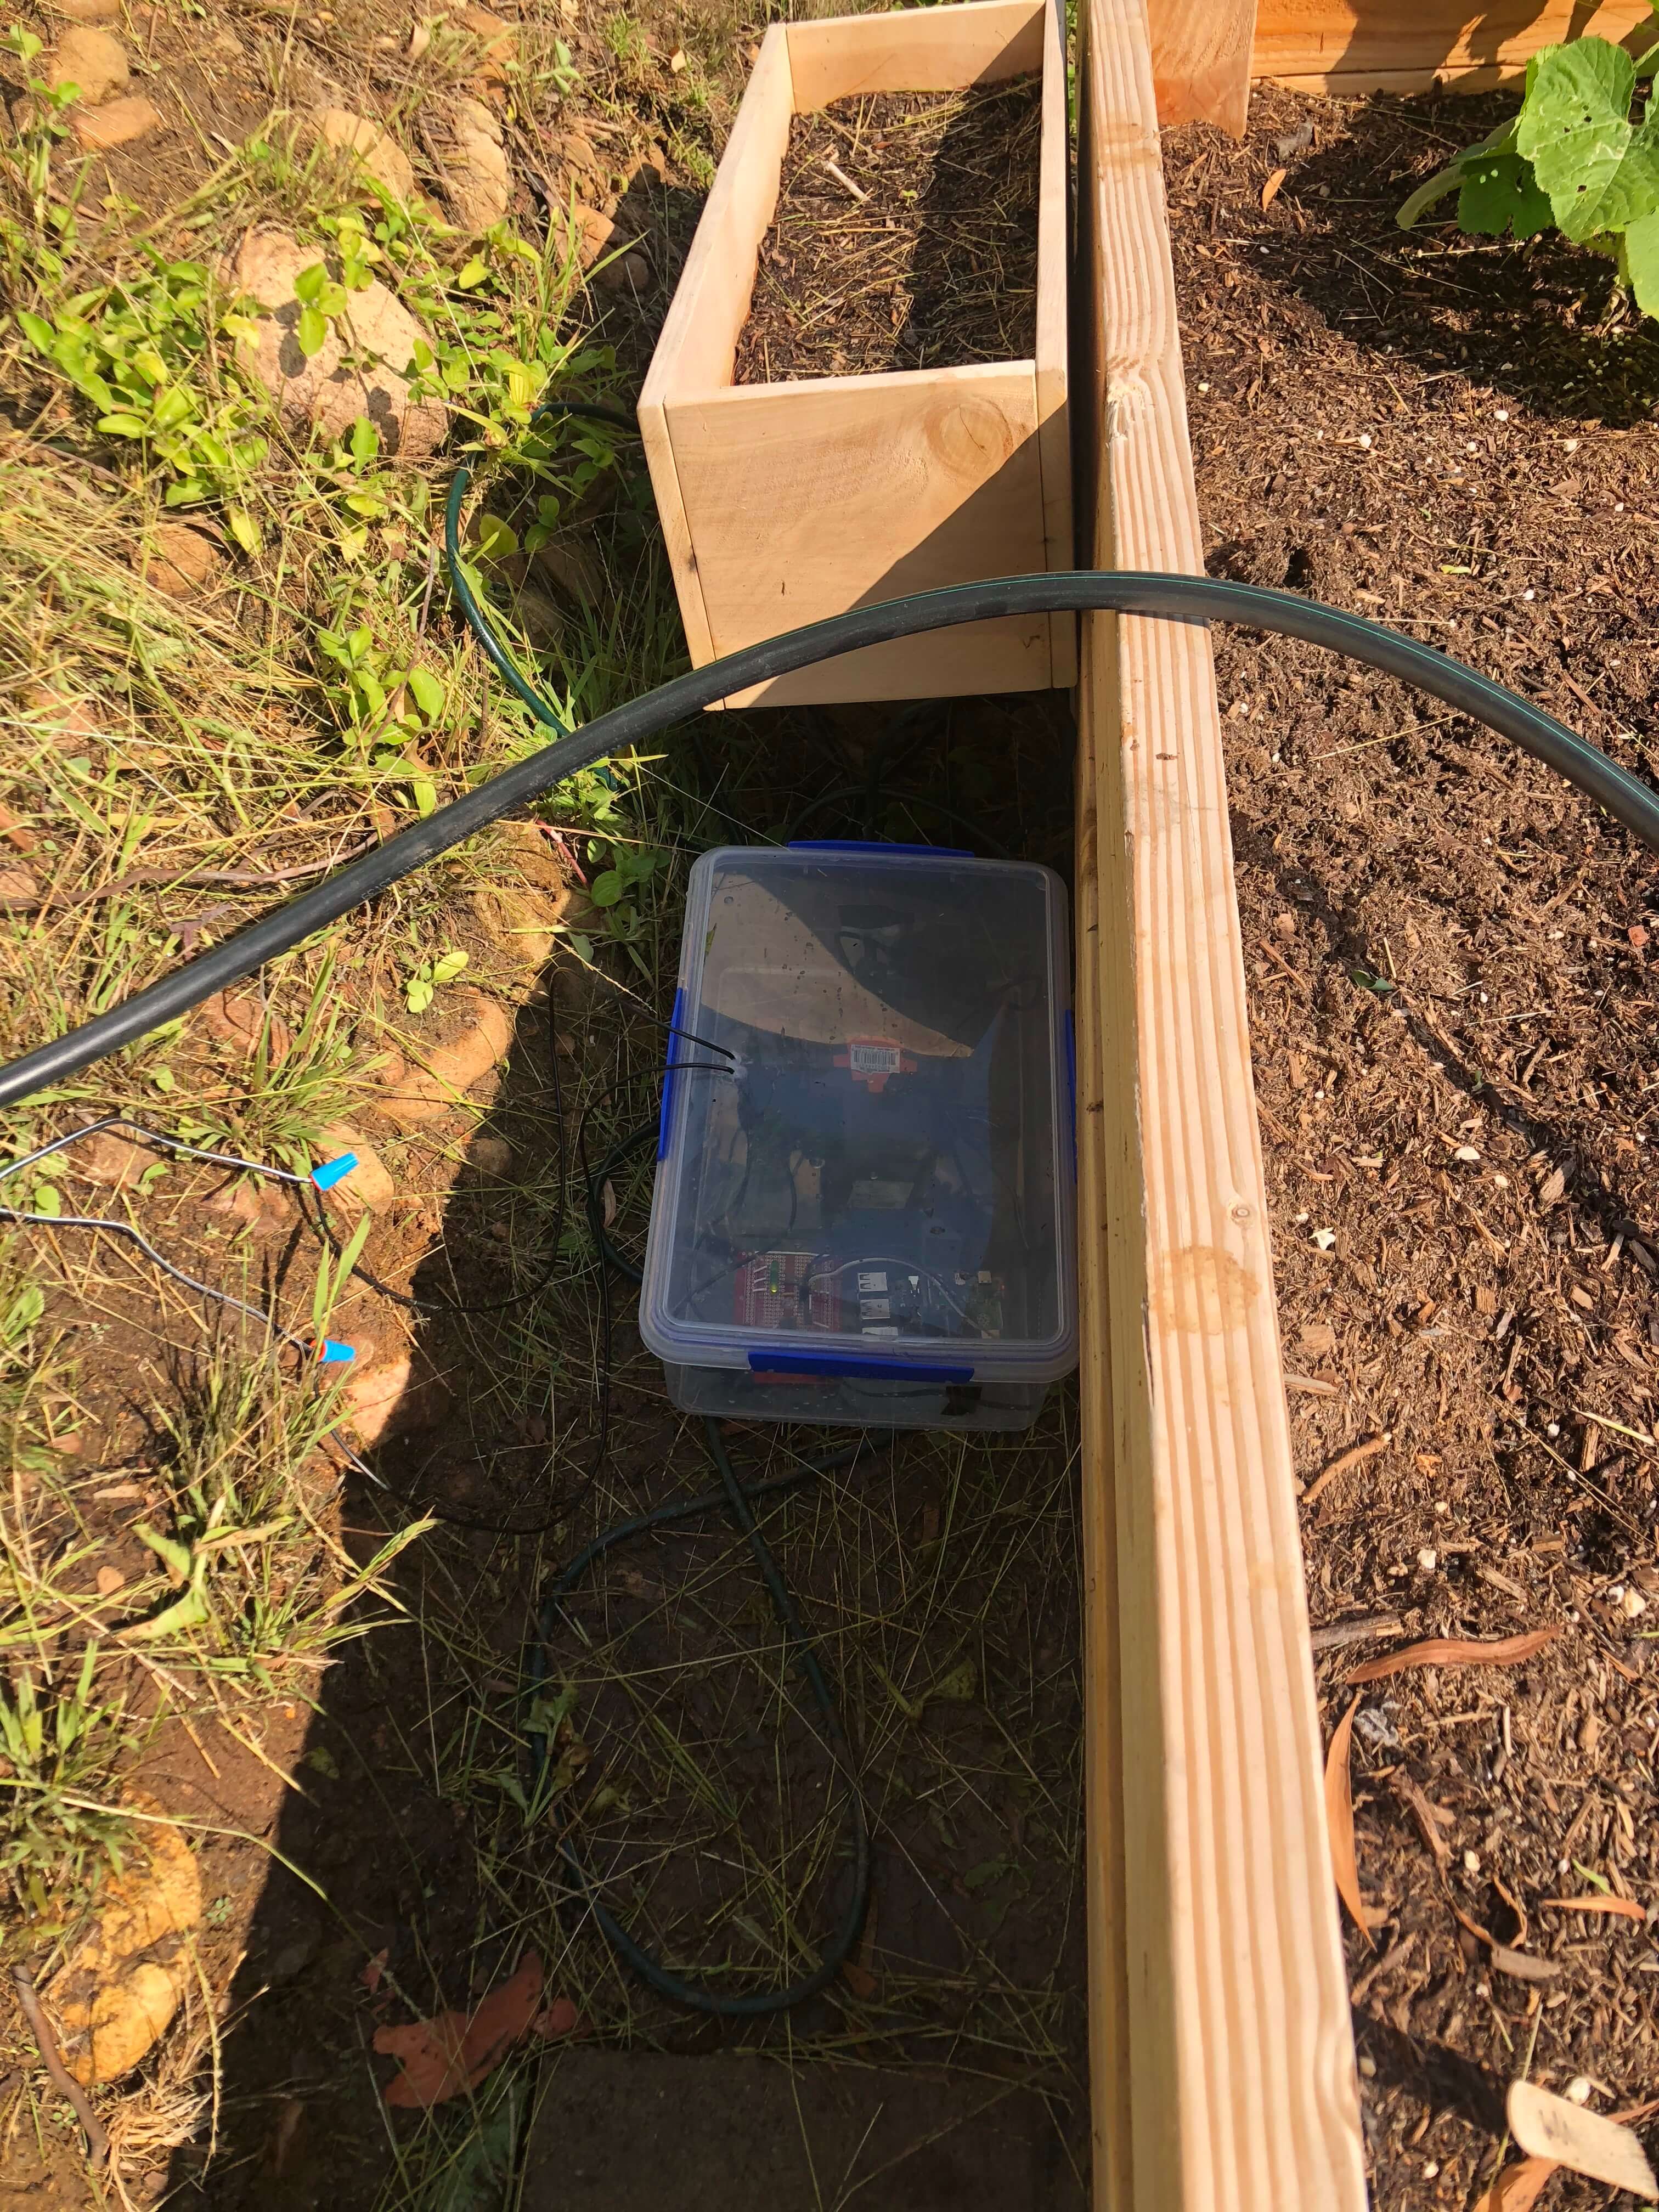
The Pi and circuit in a water-tight box
I got a food-grade watertight snap-top container to house my electronics, and cut 2 holes in it. One for the extension cord, and the other for the exit wires from the circuit to the valve. After threading the wires through, I used some 100% silicone caulking to seal it up. In the box is the Pi, the circuit board, a small power strip, and power supply cubes for both the Pi and the relay.
The power schematic
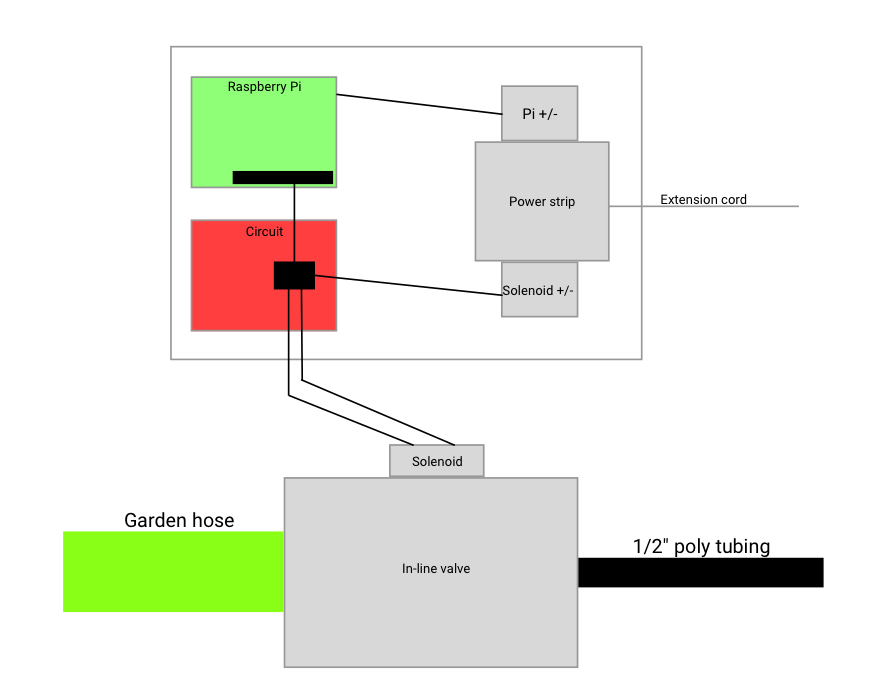
This is how the system is powered
The code
The code itself is very simple. All it does is initialize some pins, turn on the valve, and sleep for the allotted time.
import RPi.GPIO as GPIO
import time

MINUTES = 10

LED = 27
VALVE = 17

GPIO.setmode(GPIO.BCM)
GPIO.setup(VALVE, GPIO.OUT)
GPIO.setup(LED, GPIO.OUT)

GPIO.output(LED, GPIO.HIGH)
GPIO.output(VALVE, GPIO.HIGH)

time.sleep(MINUTES * 60)

GPIO.output(LED, GPIO.LOW)
GPIO.output(VALVE, GPIO.LOW)
Next steps
I'm very satisfied with how everything turned out in this first version. I think that I'll be waiting until this harvest is complete before making any new major changes. I do have a few ideas for future versions though.
More valves
I have plans drawn up for creating different watering units, controlled independently by different solenoid valves. This would allow me to water plants in sections, which I imagine would allow for greater pressure through the system, as well as more fine grained control over which plants get more water.
Better UX
I'd like for the Pi to host a simple basic auth'd website that would let me view past watering logs, adjust the watering schedule in the UI, and include a button to Water Now. One reason why I haven't done this yet is that I noticed the Pi's location is stretching the limits of our WiFi connection. It's good enough to ssh into and make adjustments on occasion, but if I needed to hit it with any more bandwidth than that I would need to either get an extender, move the unit closer to the house, or ideally both. With just one section and no additional sensors, an improved user UI isn't strictly necessary yet, but...
More sensors
The weather in Southern California tends to be predictably warm and dry, which is why my basic watering schedule is good enough for now. However, I could make a more complex schedule. I could base the watering on local weather, and save some water when it has rained recently. I could also incorporate sensors to give a better sense of when to water. Examples include measuring soil temperature or moisture levels. Additionally, a webcam pointed at the plants would look good on the hosted website and could inform a user whether or not they need extra watering that day. This was actually a driving force behind the project, because I wanted a low-maintenance garden that I could (sort of) tend to while out of town.
Aesthetics
One thing that I'd like to clean up is the piping system. A buried main line rather than an above ground hose, for example. Also, I'd like to organize the tubing within each bed a little more cleanly.
Extra Credit
I also want to give thanks to this author for the inspiration behind the project.
If you have any comments or suggestions, or want more information about how something works, send me an email! I'd be happy to help.
Thanks for reading!
Home